Working with inspection templates
Where templates live, what each field does, and how to change one safely once it is in use.
Who this is for: Staff who maintain inspection checklists day to day.
Finding your templates
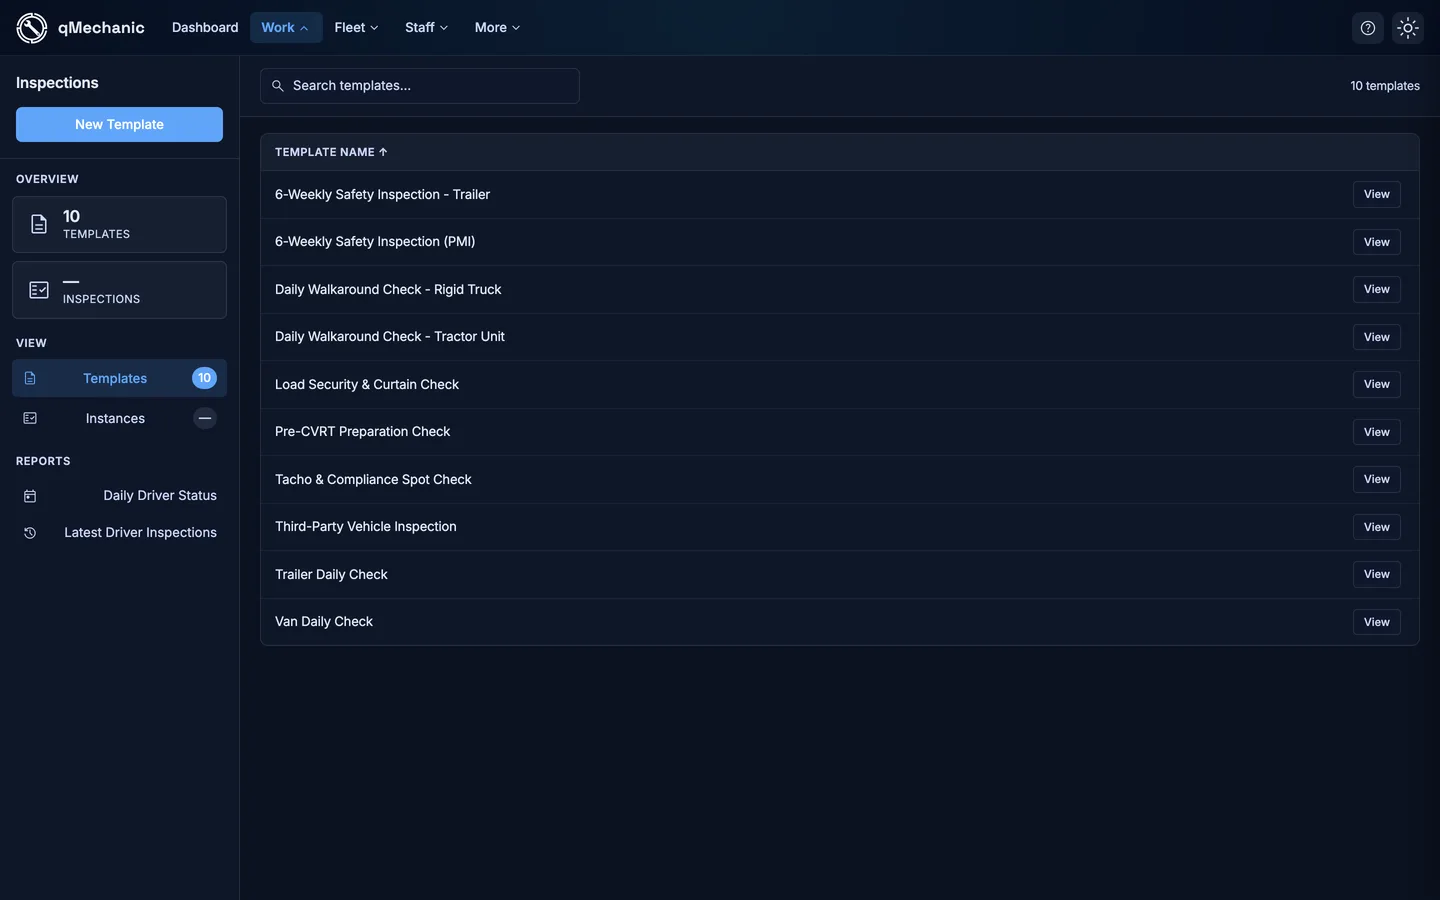
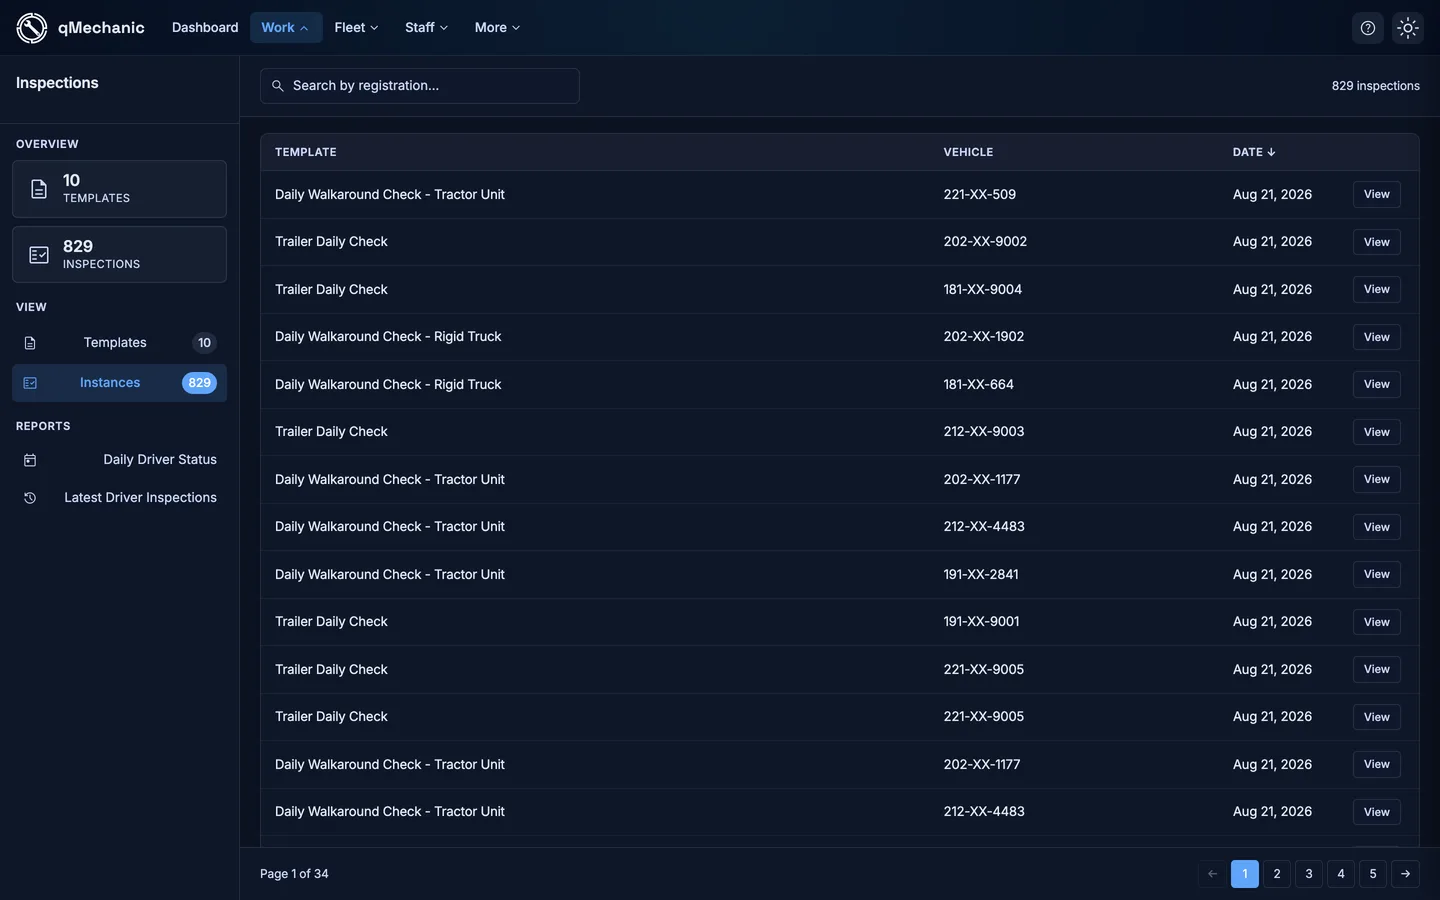
Go to Work → Inspections. The page has two tabs: Templates (the checklists you have designed) and Instances (checks that have actually been completed). The sidebar counts tell you how many of each you have.
What each field on a template does
Open any template to see its configuration. The left sidebar summarises it; the right side is where you edit.
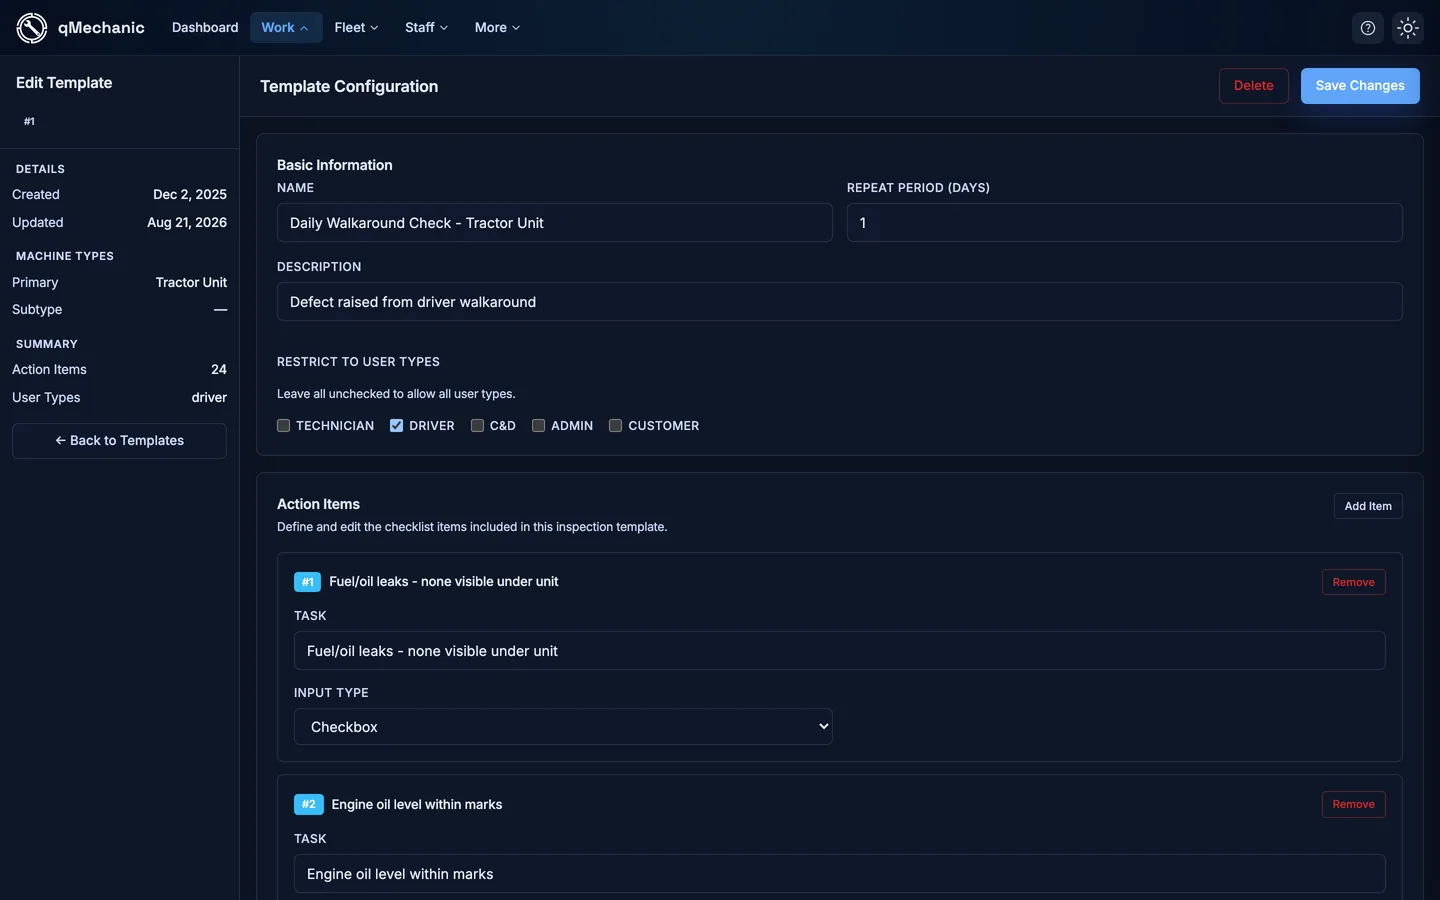
- Name — what inspectors see in the app. Make it specific.
- Repeat period (days) — how often this check is due. Drives the schedule and the “next due” date.
- Description — a short line shown under the template name when an inspector picks a check.
- Restrict to user types — tick the user types that should be offered this checklist. Leave all unchecked and everybody sees it.
- Machine type (and subtype) — which kind of vehicle this checklist applies to.
Editing the checklist items
The Action Items section is the checklist itself. Each item has the task text and an input type, plus optional measurement guidance for number and text items.
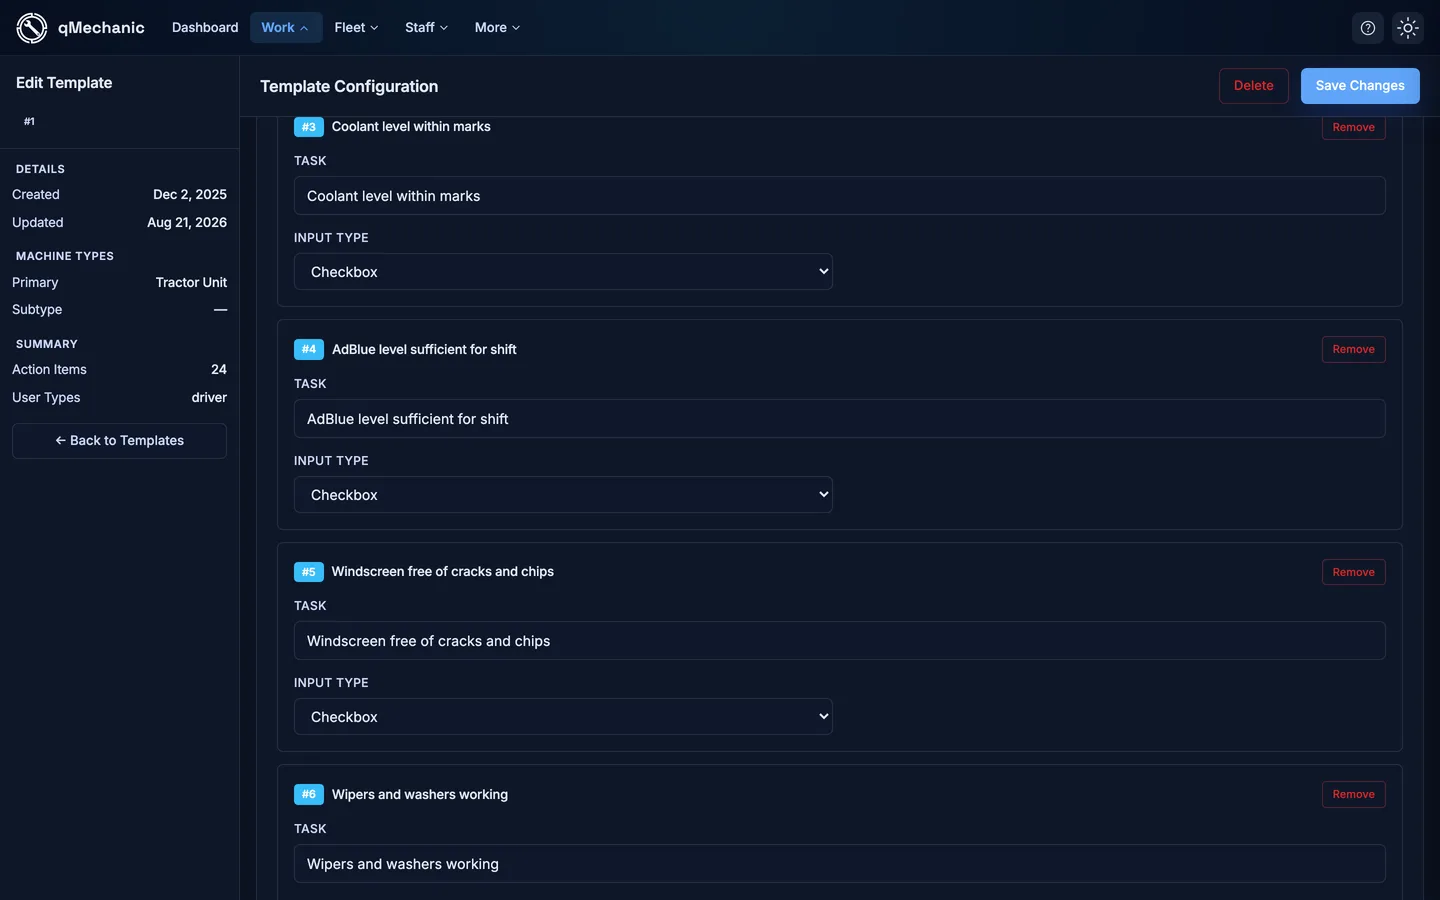
- Select “Add Item” to append a new check to the end of the list.
- Set the Input Type — Checkbox, Text, Number or Photo.
- For Number and Text items, use Measurement Guidance to tell the inspector the unit or limit, such as “mm (min 1.0mm)”.
- Use “Remove” to delete an item, then “Save Changes”.
TipOrder matters. Sequence the items the way somebody physically walks around the vehicle, so nothing gets skipped.
Changing a template that is already in use
Completed inspections keep their own copy of the checklist as it was on the day. Editing a template changes what happens from now on; it does not rewrite history.
TipThis means your past records stay accurate and auditable after you improve a checklist — but it also means a fix only takes effect on the next inspection, not on ones already completed.
TipIf a check changes fundamentally, consider building a new template and retiring the old one rather than editing it, so the two sets of results stay comparable.
Completed inspections
Go to Work → Inspections → Instances. This is every check that has actually been completed, newest first, with the vehicle and the inspector.
Reading a single inspection
Open any instance to see exactly what the inspector recorded.
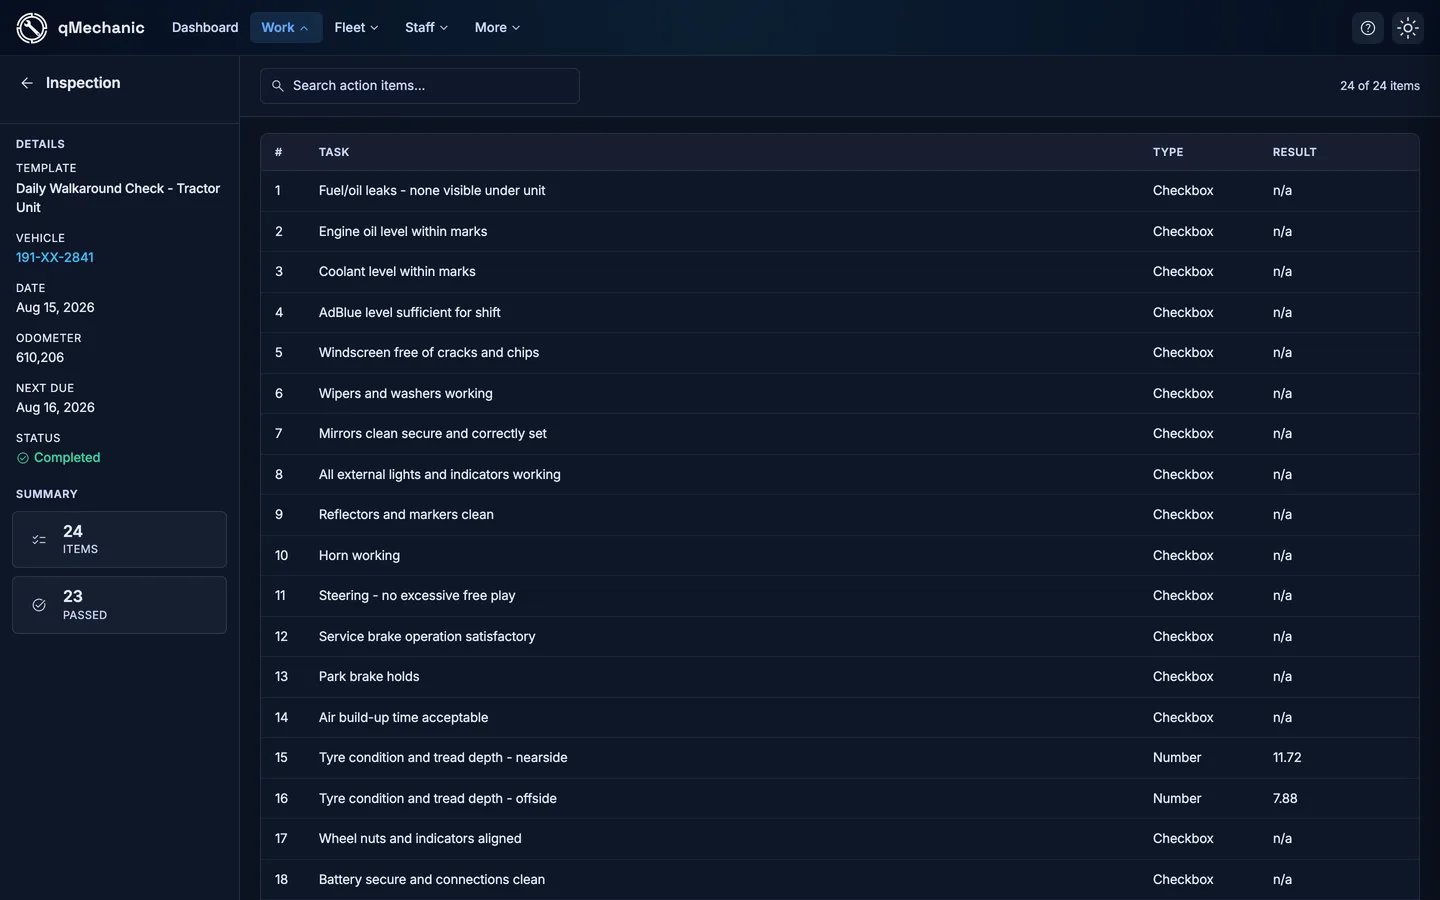
- The sidebar shows the template used, the vehicle, the date, the odometer reading and when the check is next due.
- The Summary tiles tell you how many items were on the checklist and how many passed — 23 of 24 in the example above.
- Number items show the reading the inspector actually entered, such as a tread depth of 11.72mm.
- Checkbox items record n/a in the result column, because a tick has no measurement — the passed count in the summary is what tells you how many were satisfied.
- Any fault raised during the check becomes a defect, which you follow up from the Defects screen below.
Acting on defects
A defect is a fault an inspector raised. It stays open until somebody resolves it, which is what makes this list the one to work from each morning.
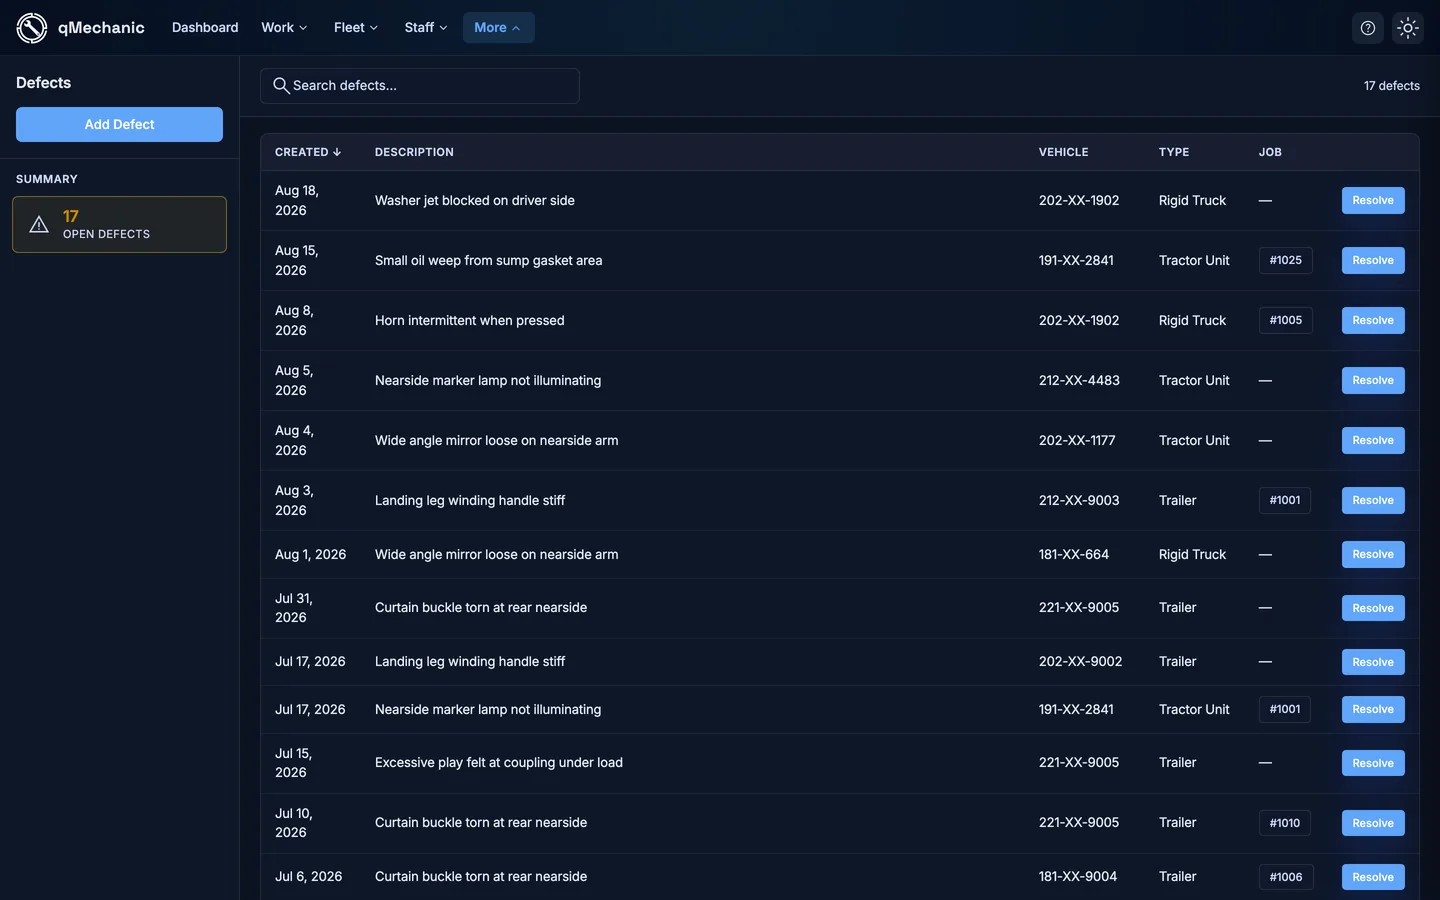
- Go to More → Defects to see everything outstanding across the fleet.
- Open a defect to see which inspection raised it and on which vehicle.
- Attach it to a job card so a technician can be assigned the work.
- Mark it resolved once the work is signed off.
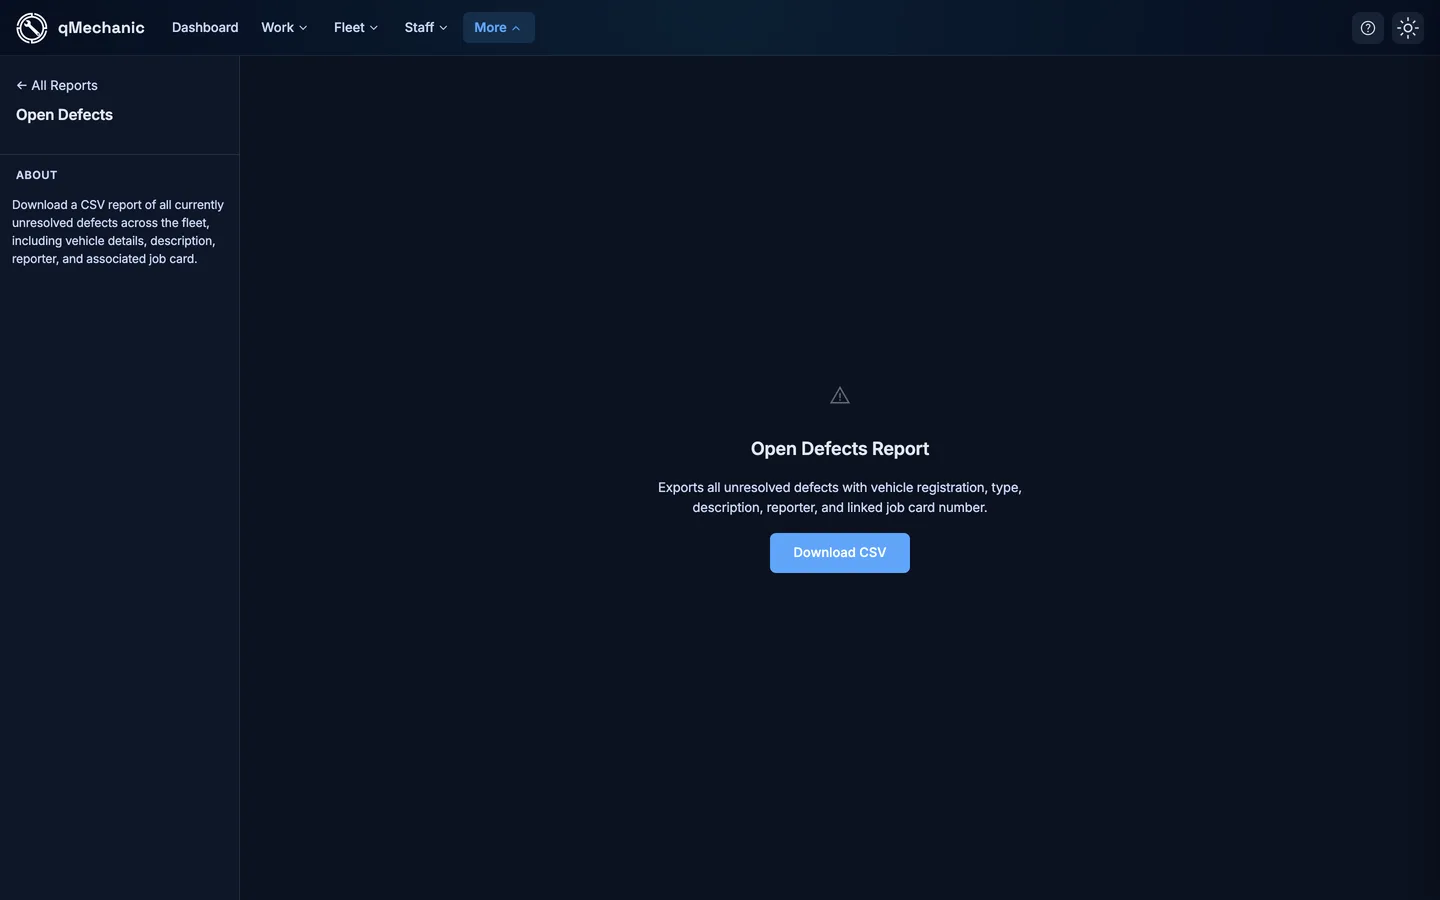
TipA defect with no job card against it is the thing that quietly gets forgotten. The Open Defects report exists to catch exactly that.
Turning a defect into workshop work
Job cards are where the repair actually gets tracked — parts, labour hours and sign-off.
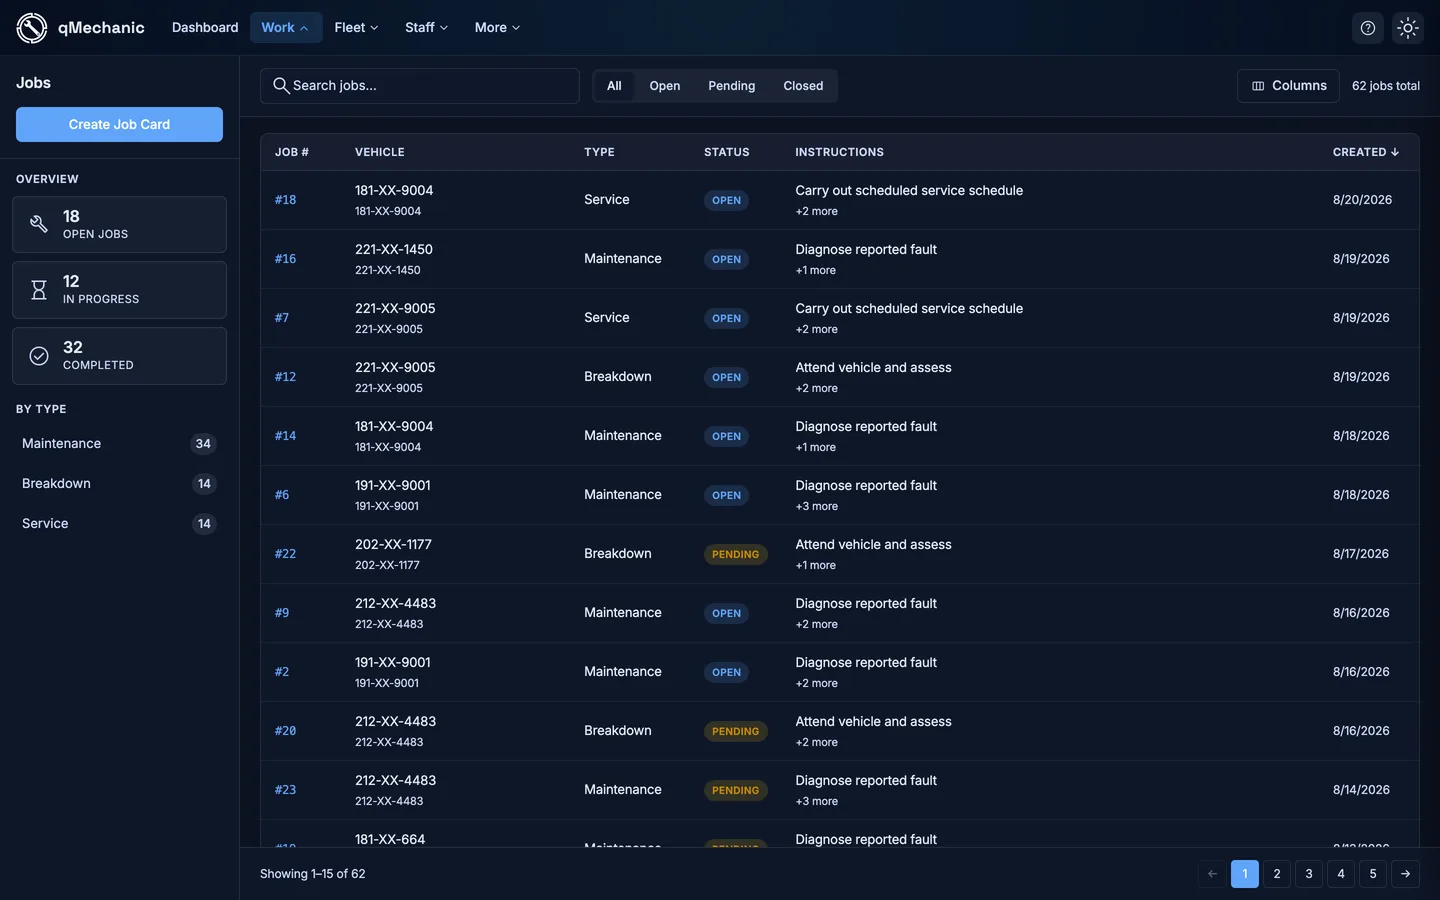
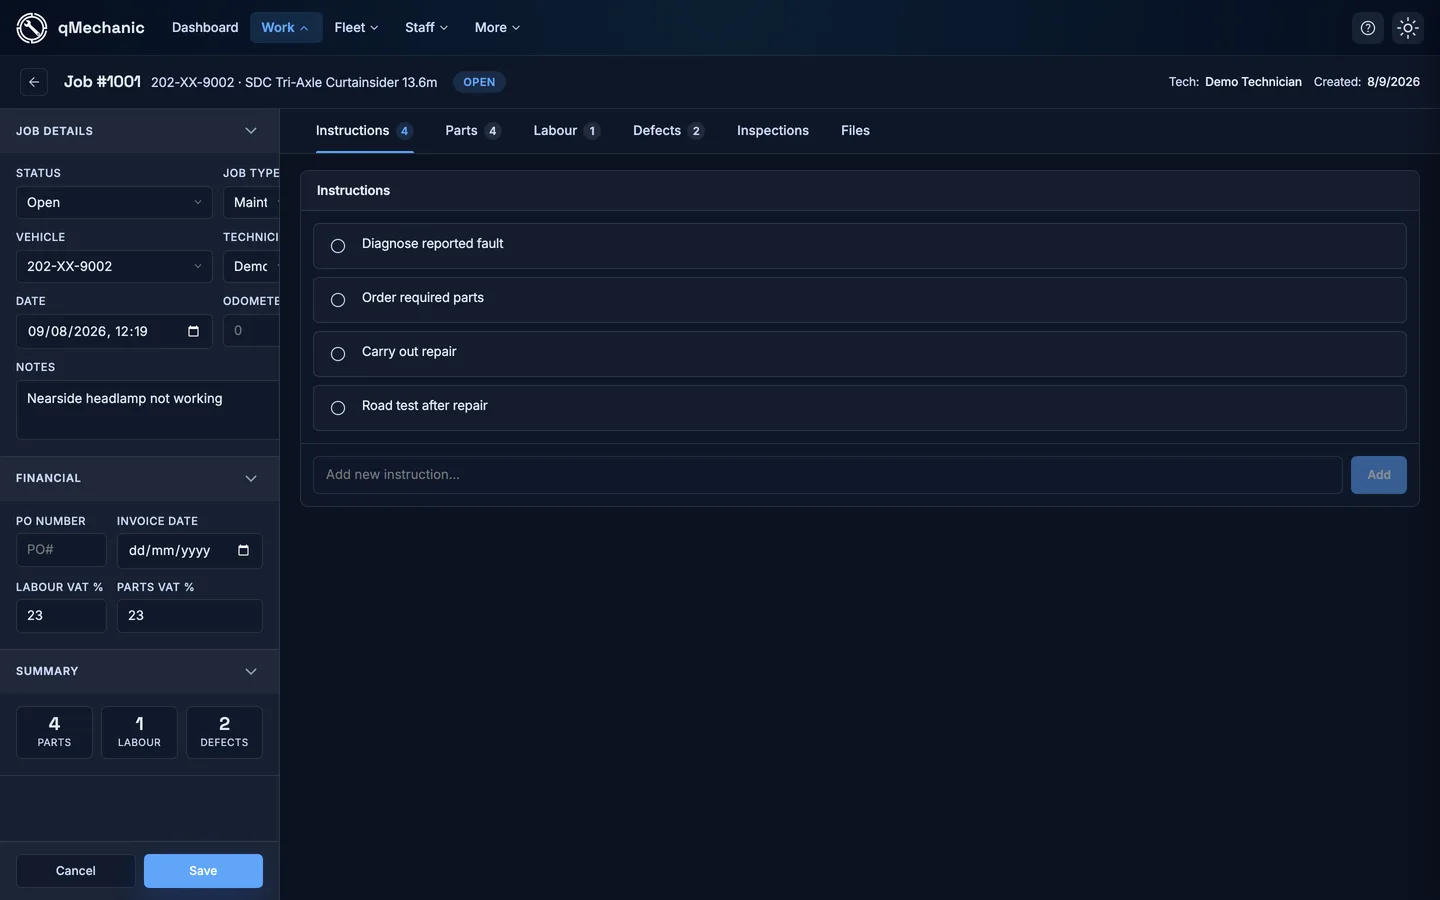
- Go to Work → Jobs → “Create Job Card”, or open the job that the inspection raised automatically.
- Pick the vehicle and set the type — Maintenance, Breakdown or Service.
- Assign a technician and add the instruction lines describing the work.
- As work happens, parts and labour are booked against the card.
- Close the job when it is signed off, which lets you resolve the defect behind it.
Proving today’s checks were done
The dashboard carries a live panel for today’s walkarounds, and the full report sits behind it. This is the view to open first thing.
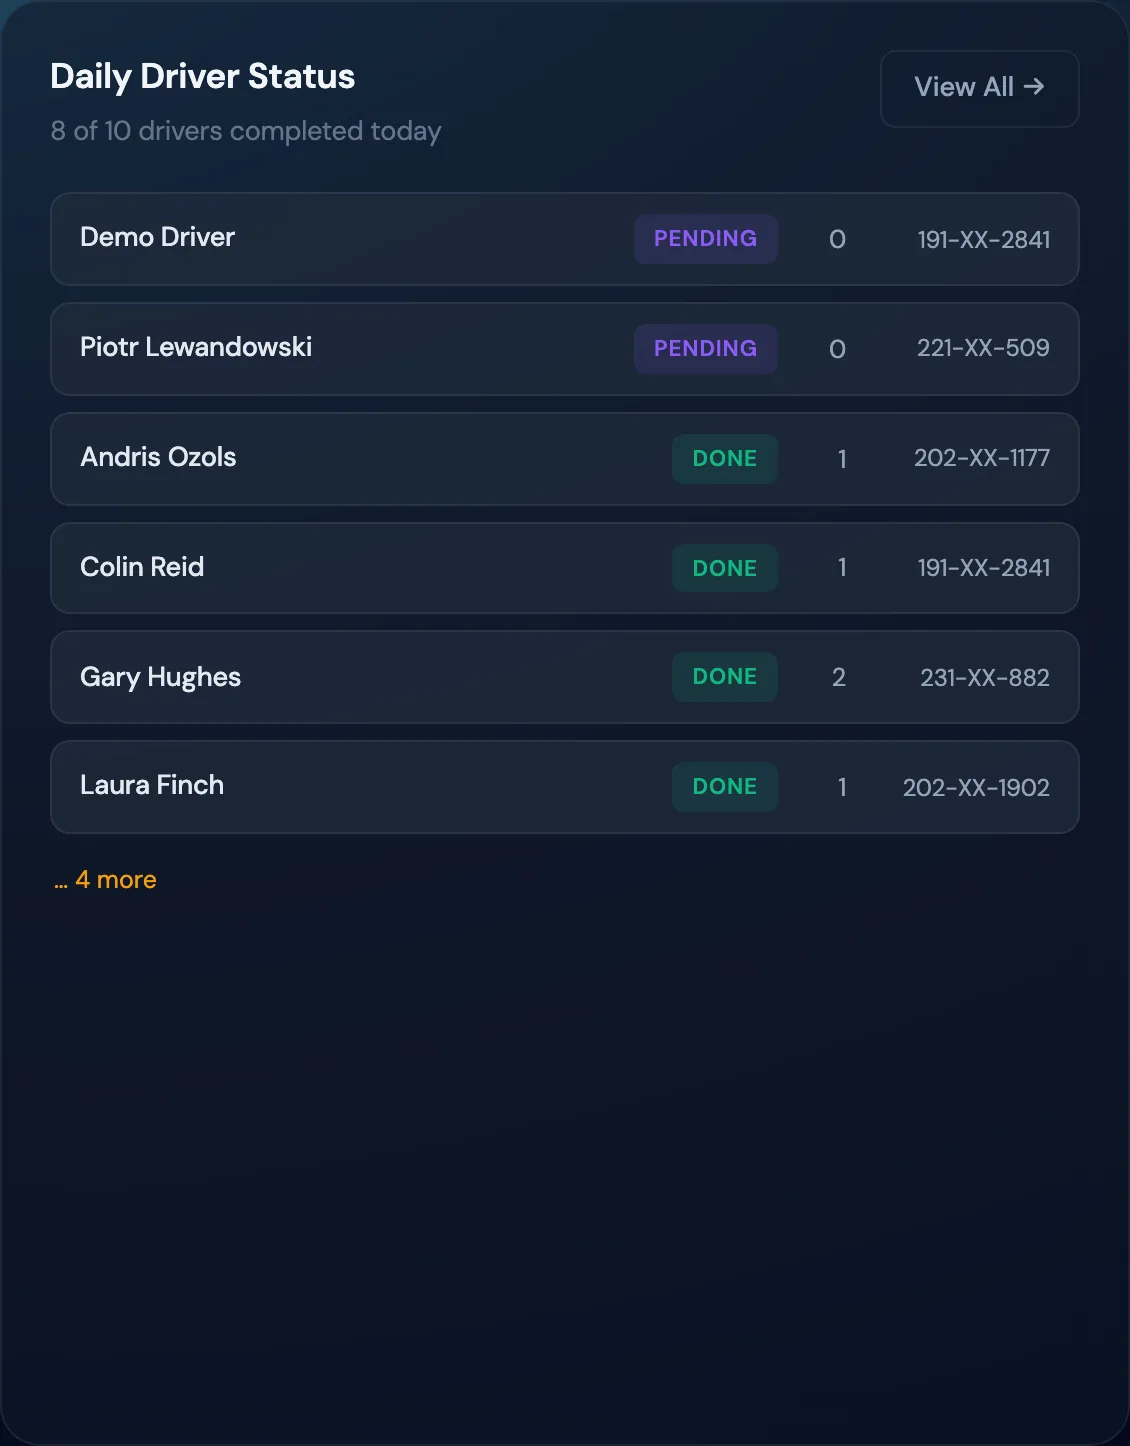
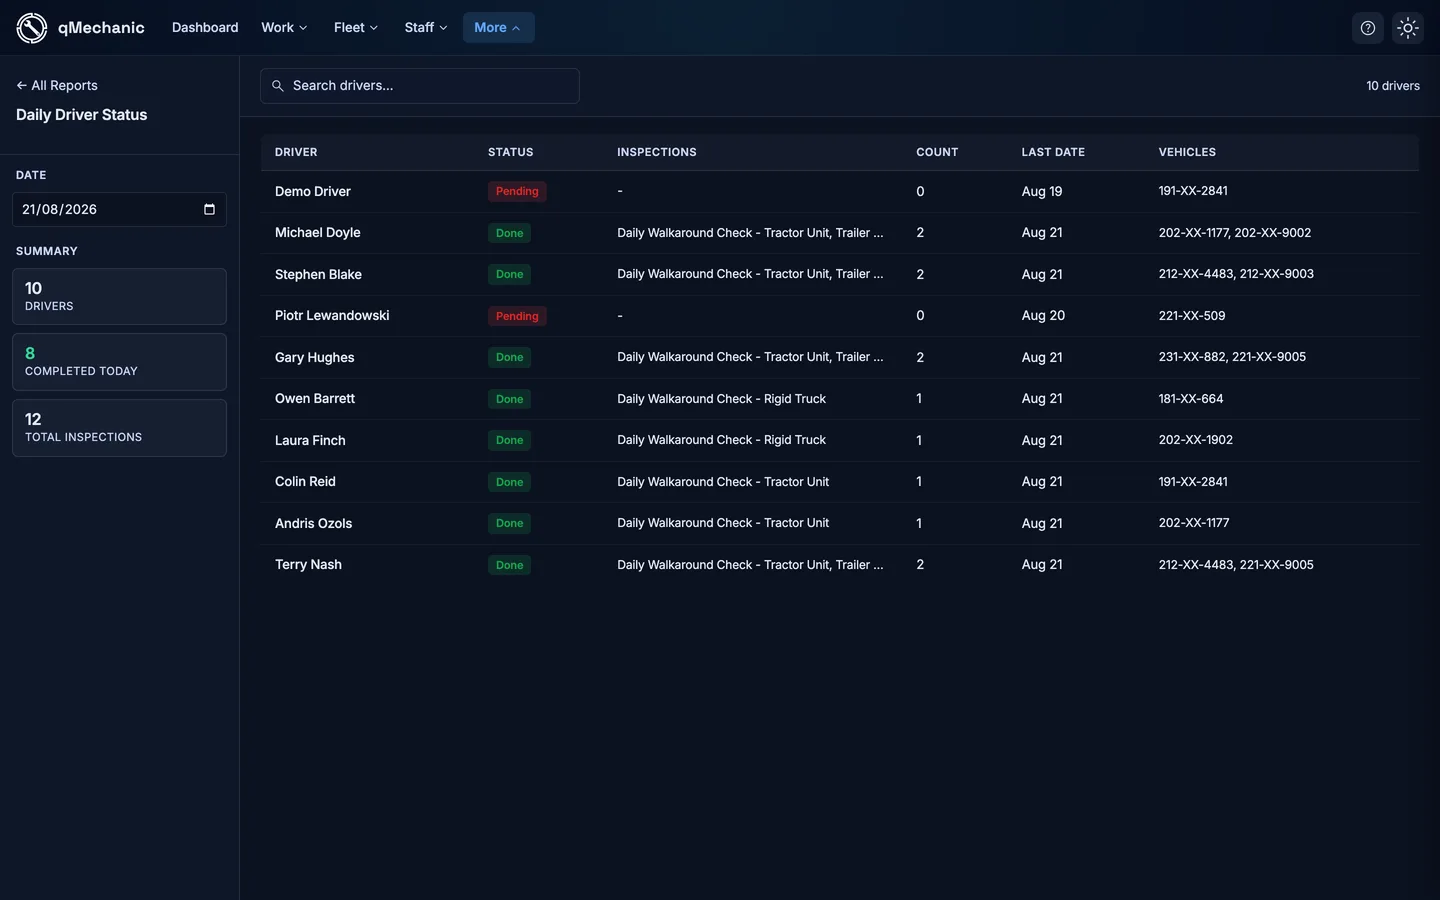
- Open the Dashboard and find the Daily Driver Status panel.
- Anyone marked Pending has not completed their check yet today.
- Select “View All” for the full report, where you can change the date and search by driver.
- Use it as a morning stand-up list: chase the Pending rows, then move on.
The other inspection reports
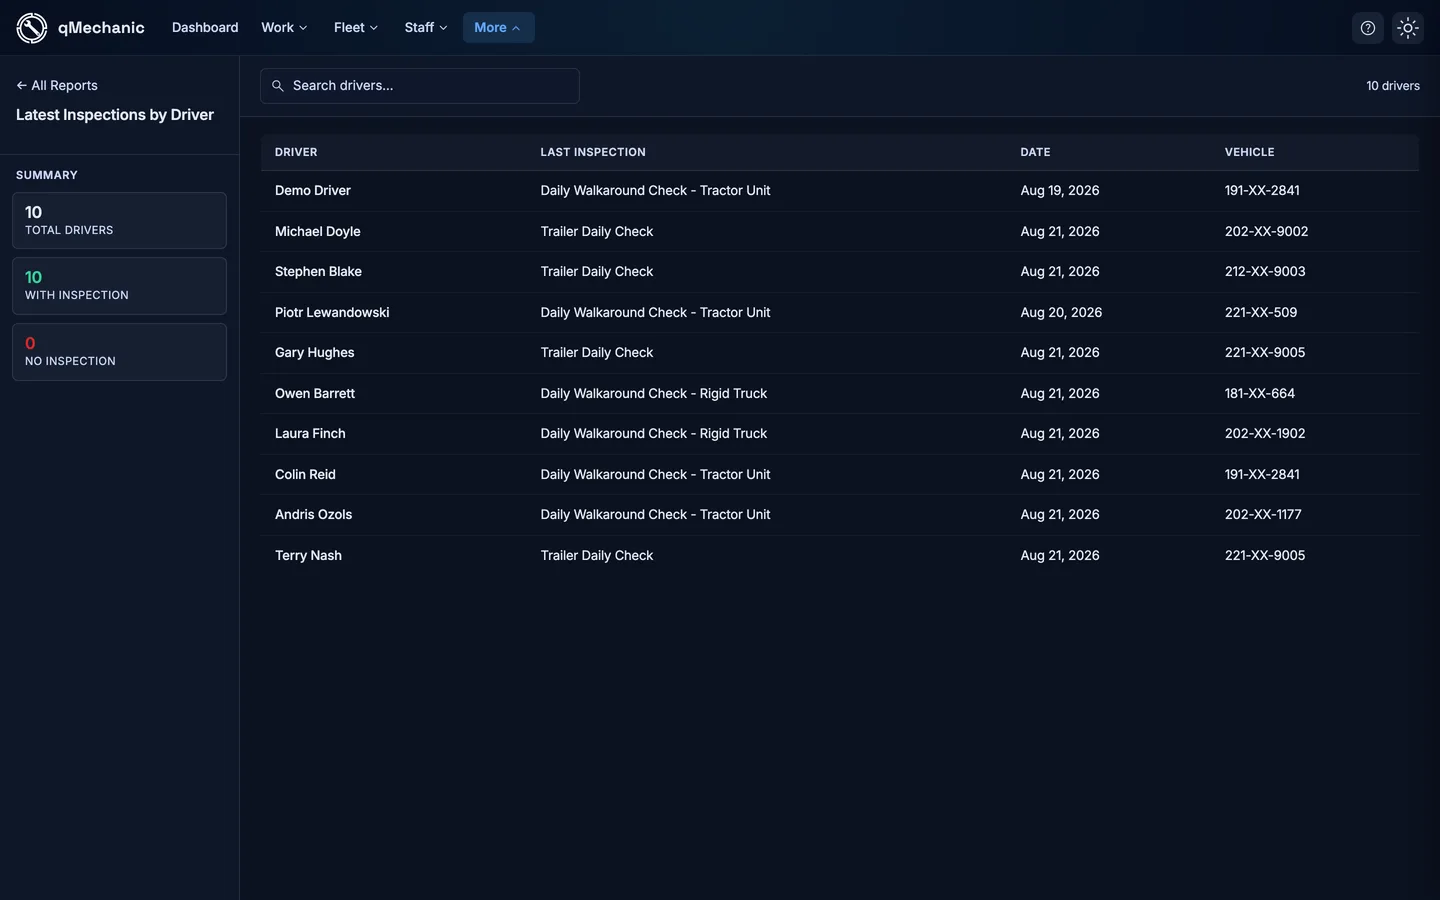
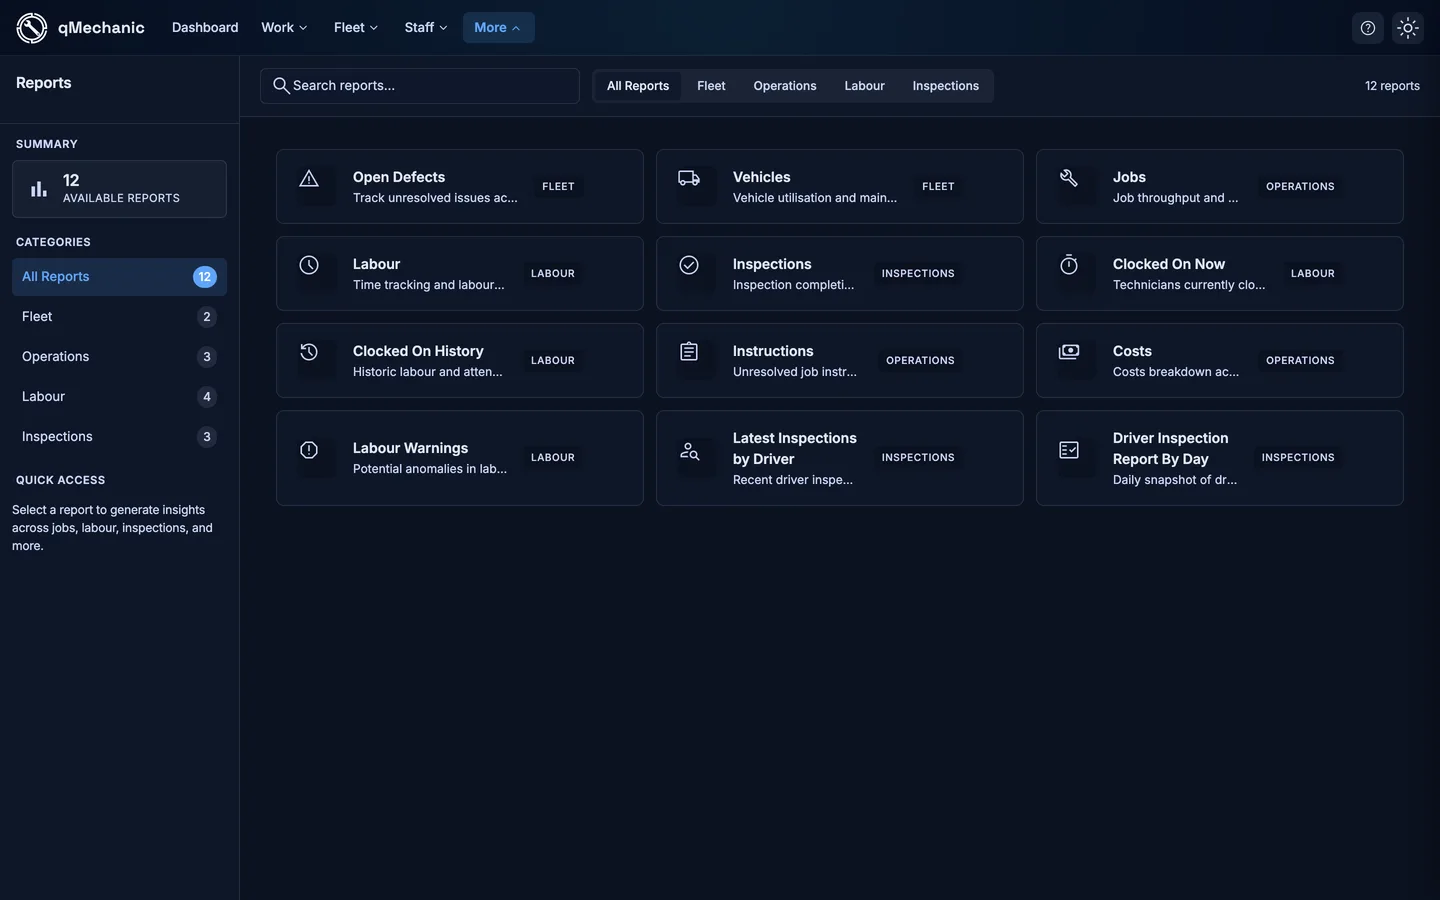
Three more reports answer the questions that come up most often.
Seeing what is due next
The schedule projects upcoming checks from each template’s repeat period and each vehicle’s history, so you can see what is coming before it is late.
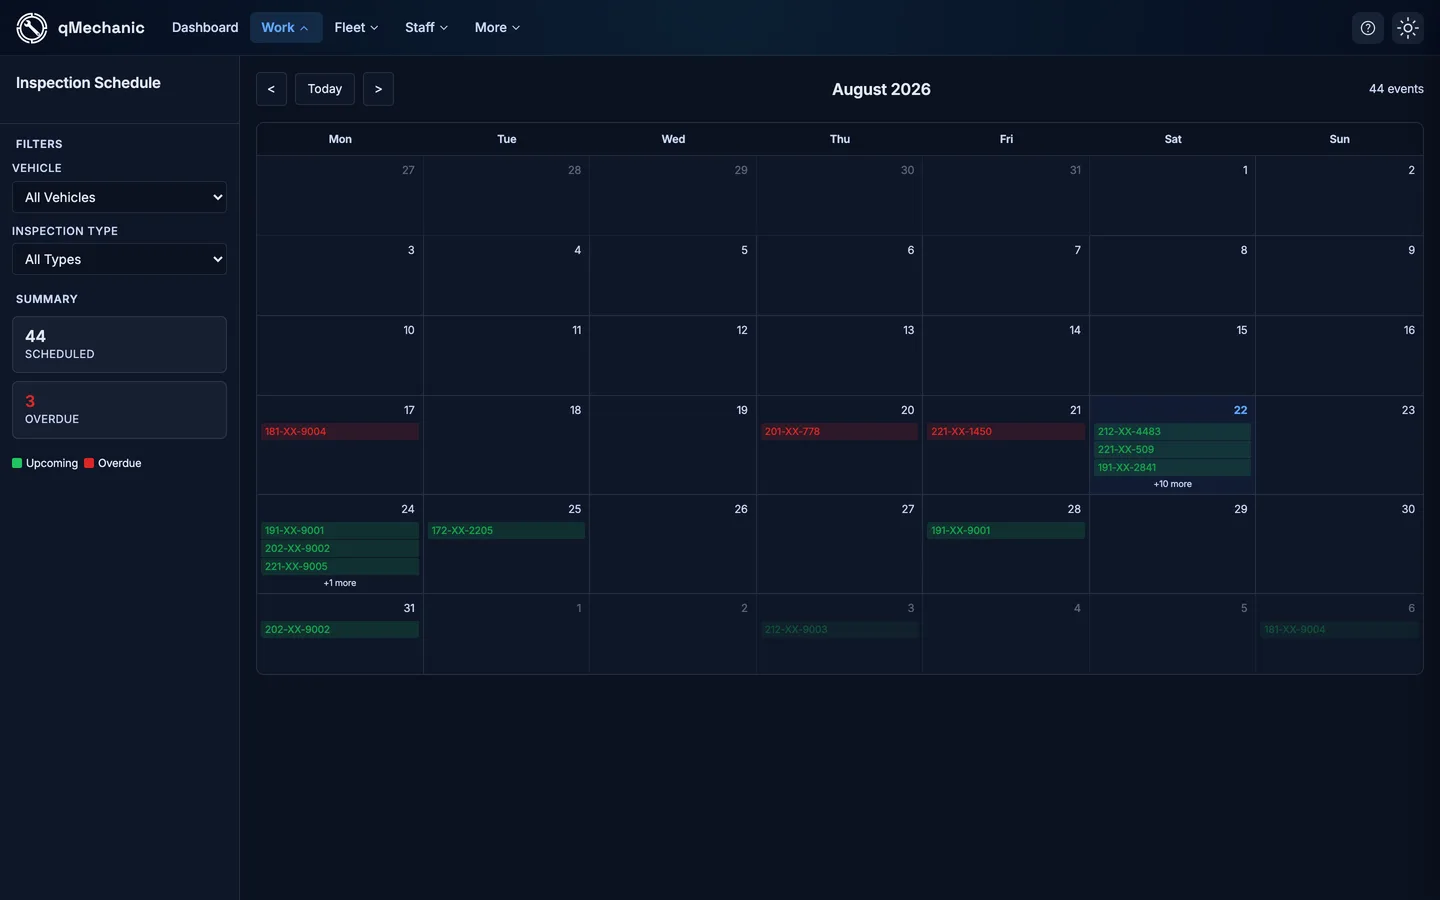
TipIf the schedule looks empty, check that your templates have a Repeat period set. Without one, there is nothing for the projection to work from.
Keeping vehicles legal alongside inspections
Inspections cover the daily and periodic checks you run yourself. Compliance events cover the dated certificates — roadworthiness tests, tacho calibration, tax and insurance.
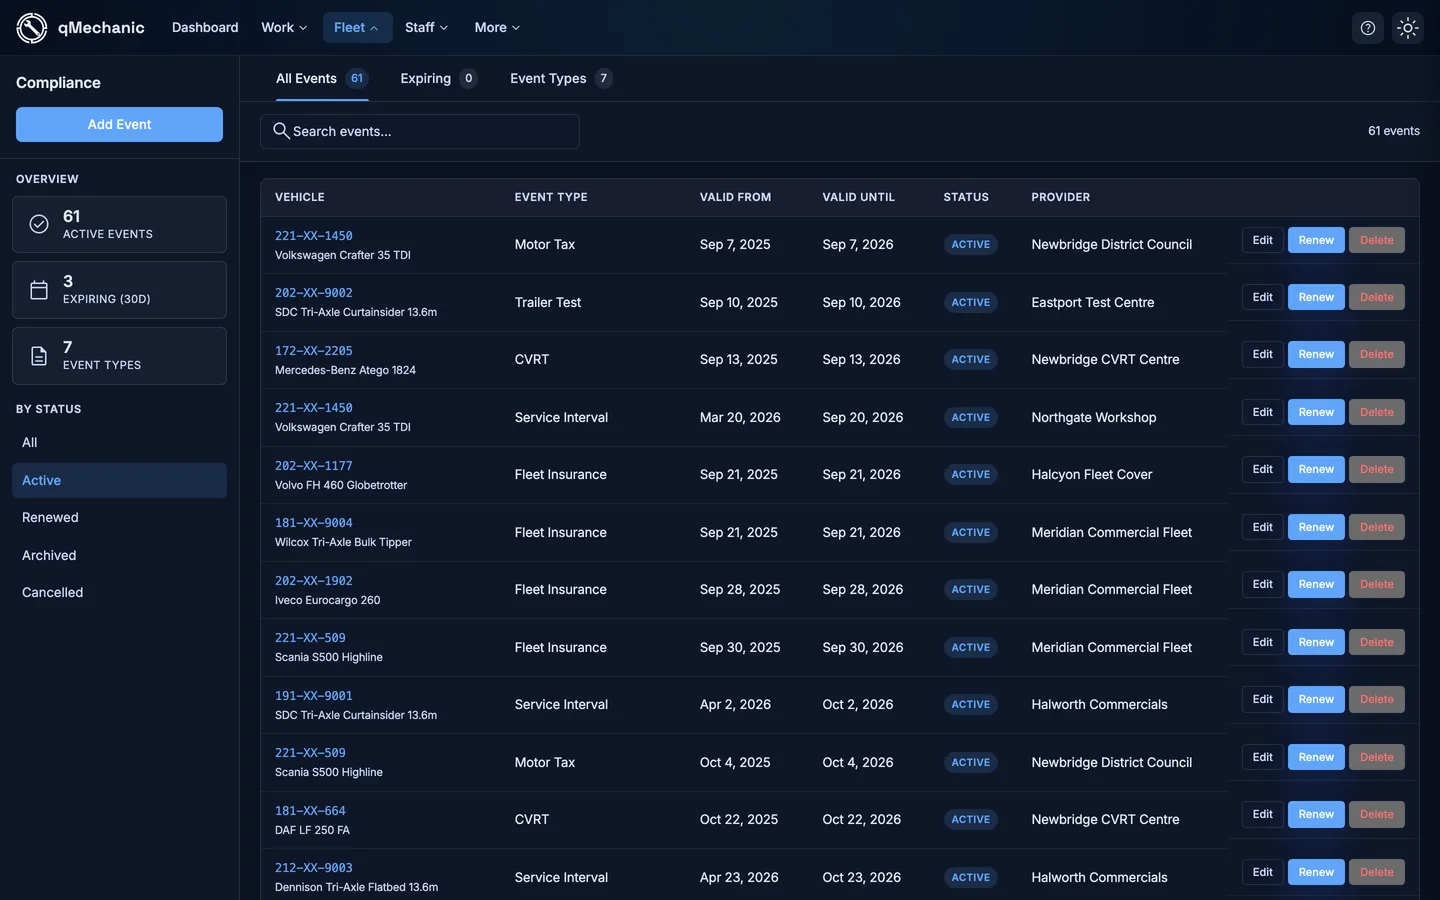
TipSet the reminder days on each event type so you are warned with enough notice to actually book the work in.