Set up inspections from scratch
The full path from an empty system to drivers completing daily walkaround checks on their phones.
Who this is for: The person setting inspections up for the first time. Work through it in order.
What this guide covers
An inspection is a checklist someone completes against a vehicle — a driver’s daily walkaround, a six-weekly safety inspection, a pre-test check. You build the checklist once as a template, and the app hands it to the right people on the right vehicles from then on.
TipFour things need to exist before an inspection can happen: vehicle types, vehicles, people, and a template. This guide does them in that order, because each one depends on the one before it.
Step 1 — Set up your vehicle types
Templates are aimed at a type of vehicle rather than at each vehicle individually. Set the types up first and you only ever build one “Tractor Unit” checklist, no matter how many units you add later.
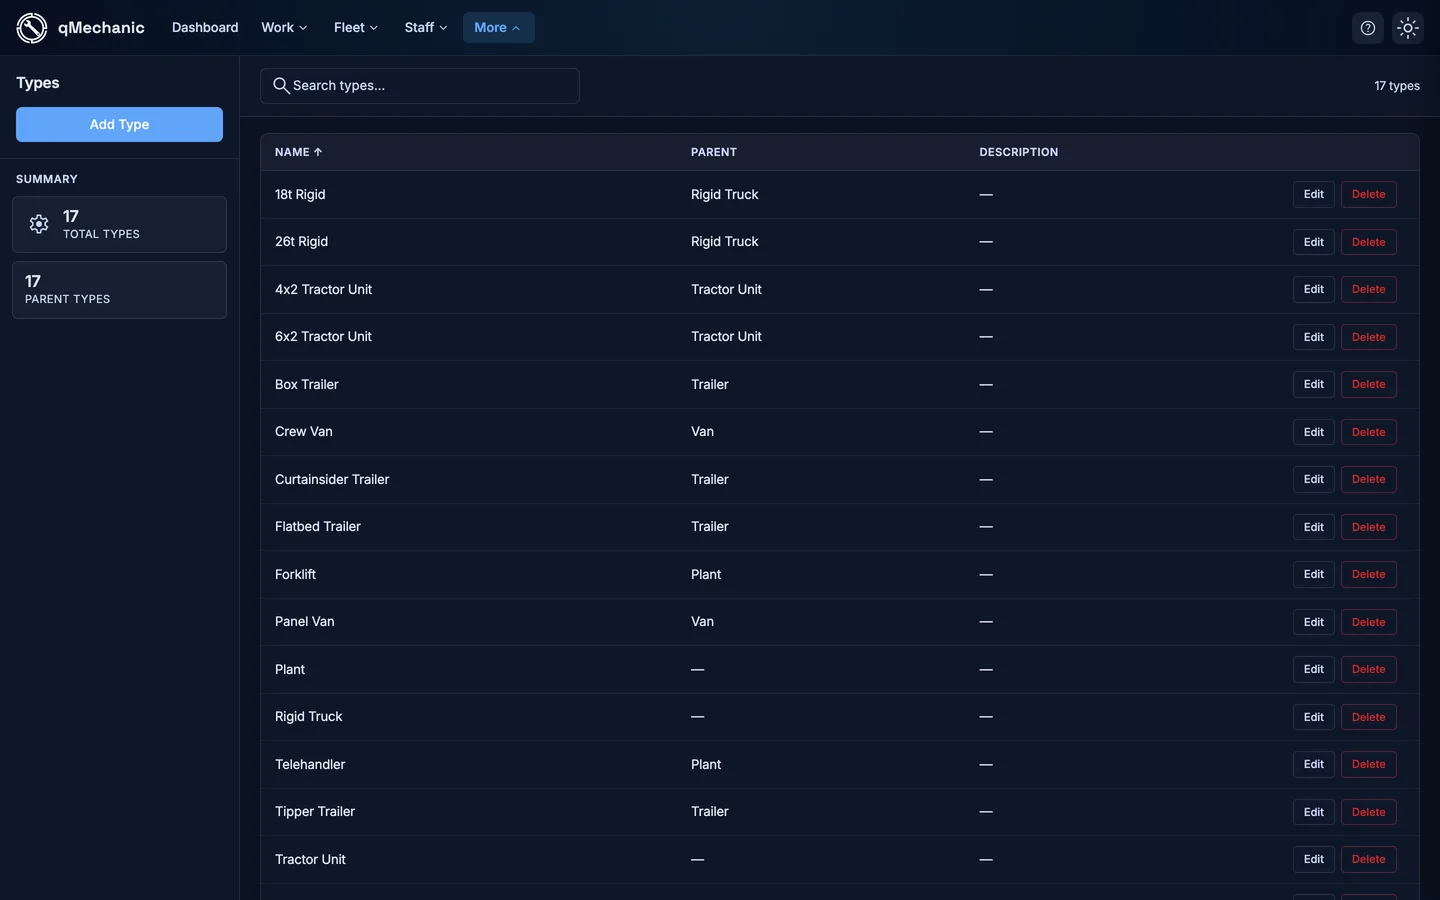
- Go to More → Machine Types.
- Add a top-level type for each broad category you run — for example Tractor Unit, Rigid Truck, Trailer, Van.
- Add subtypes underneath where the checks genuinely differ (a tipper trailer is not checked like a box trailer).
TipKeep this list short to begin with. You can add subtypes later without touching the templates that already exist.
Step 2 — Add your vehicles
Each vehicle is attached to one of the types you just created. That link is what decides which checklists it can be inspected with.
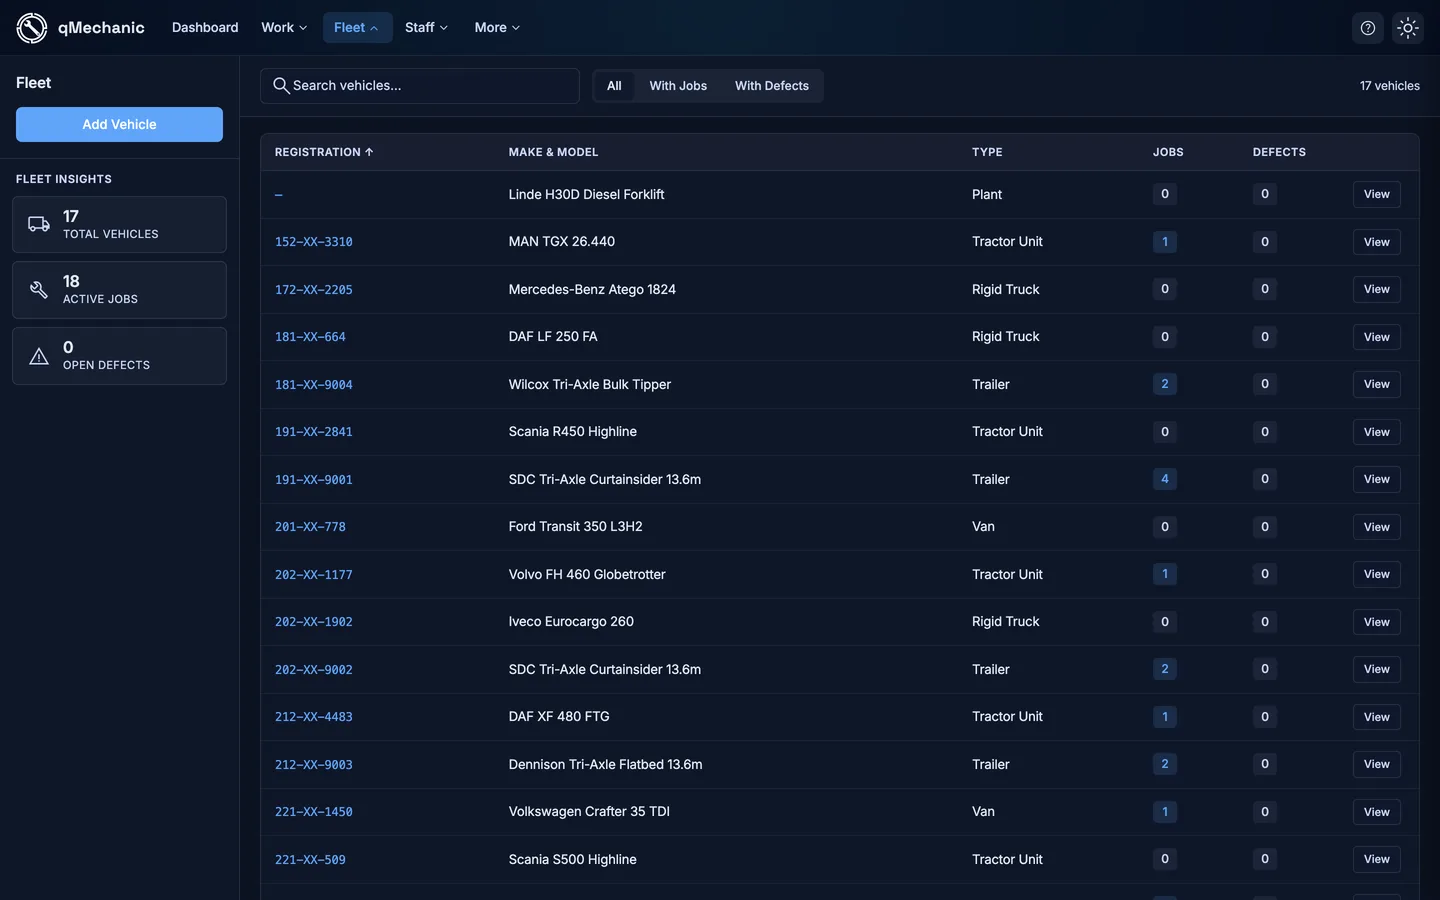
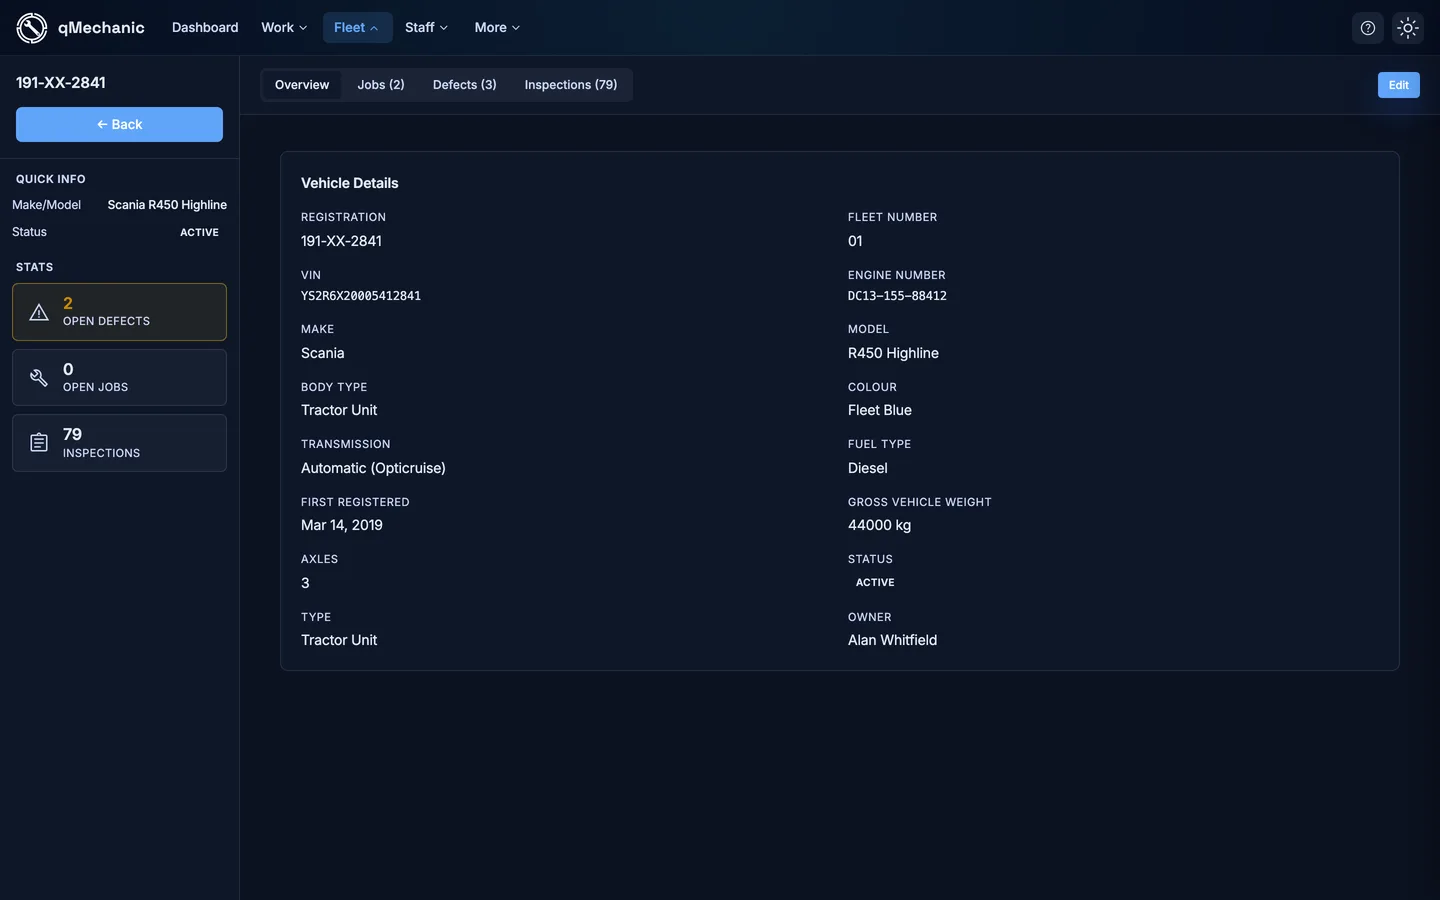
- Go to Fleet → Vehicles → “Add Vehicle”.
- Fill in the registration, fleet number and VIN. Fleet number is what your drivers actually say out loud, so it is worth setting.
- Set the Type (and subtype) — this is the important field for inspections.
- Save, then repeat for the rest of the fleet.
TipTrailers are vehicles too. Add them as their own records so they can be checked separately from the unit pulling them.
Step 3 — Add your drivers and technicians
Every person has a user type, and the user type decides what they see. A driver gets the walkaround checks; a technician gets the workshop inspections. Get this wrong and people either see nothing or see everything.
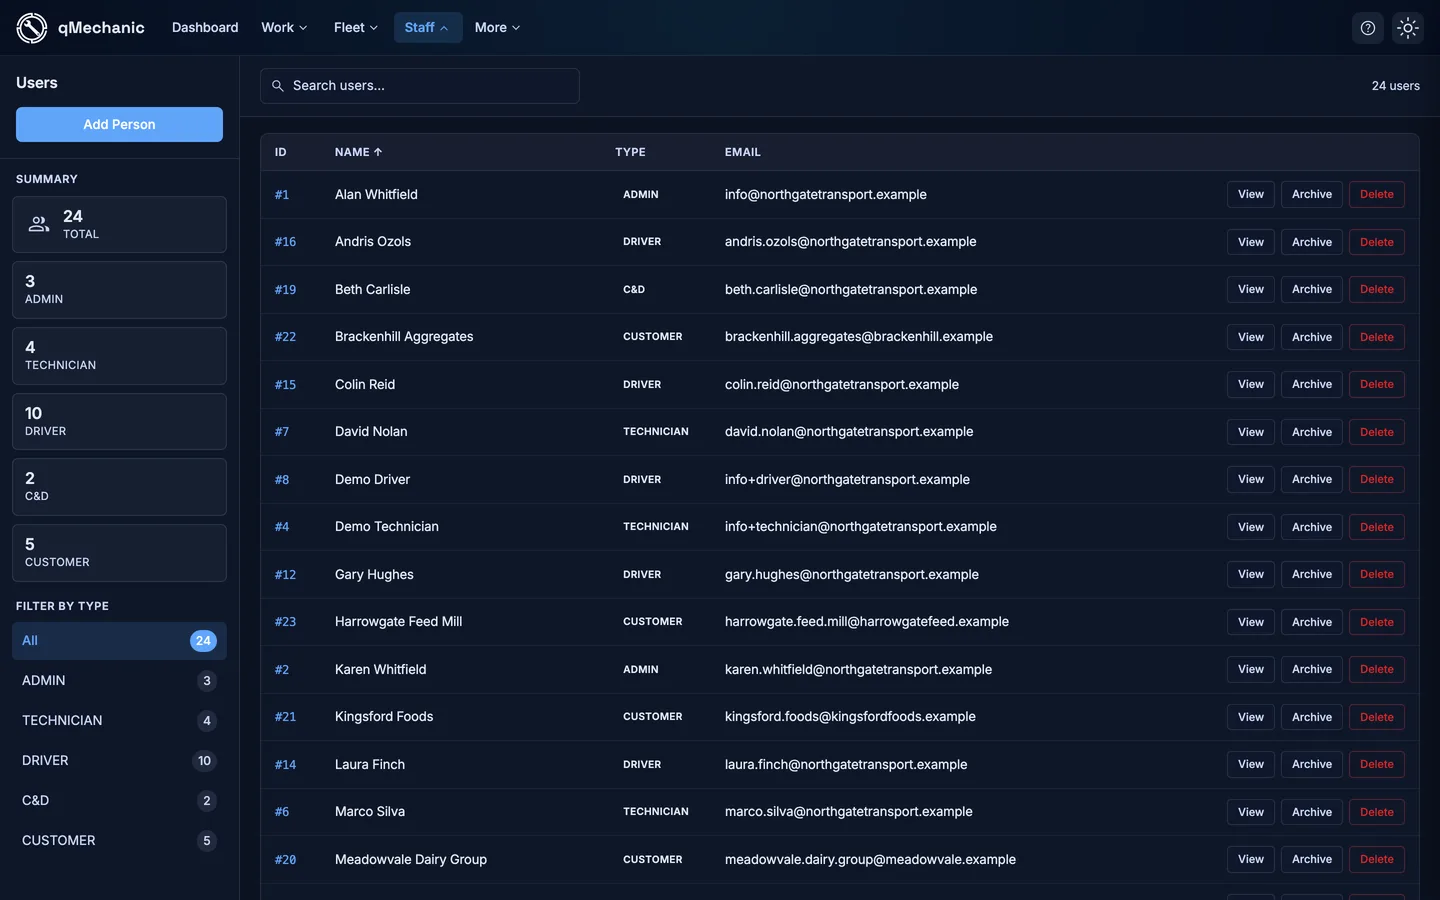
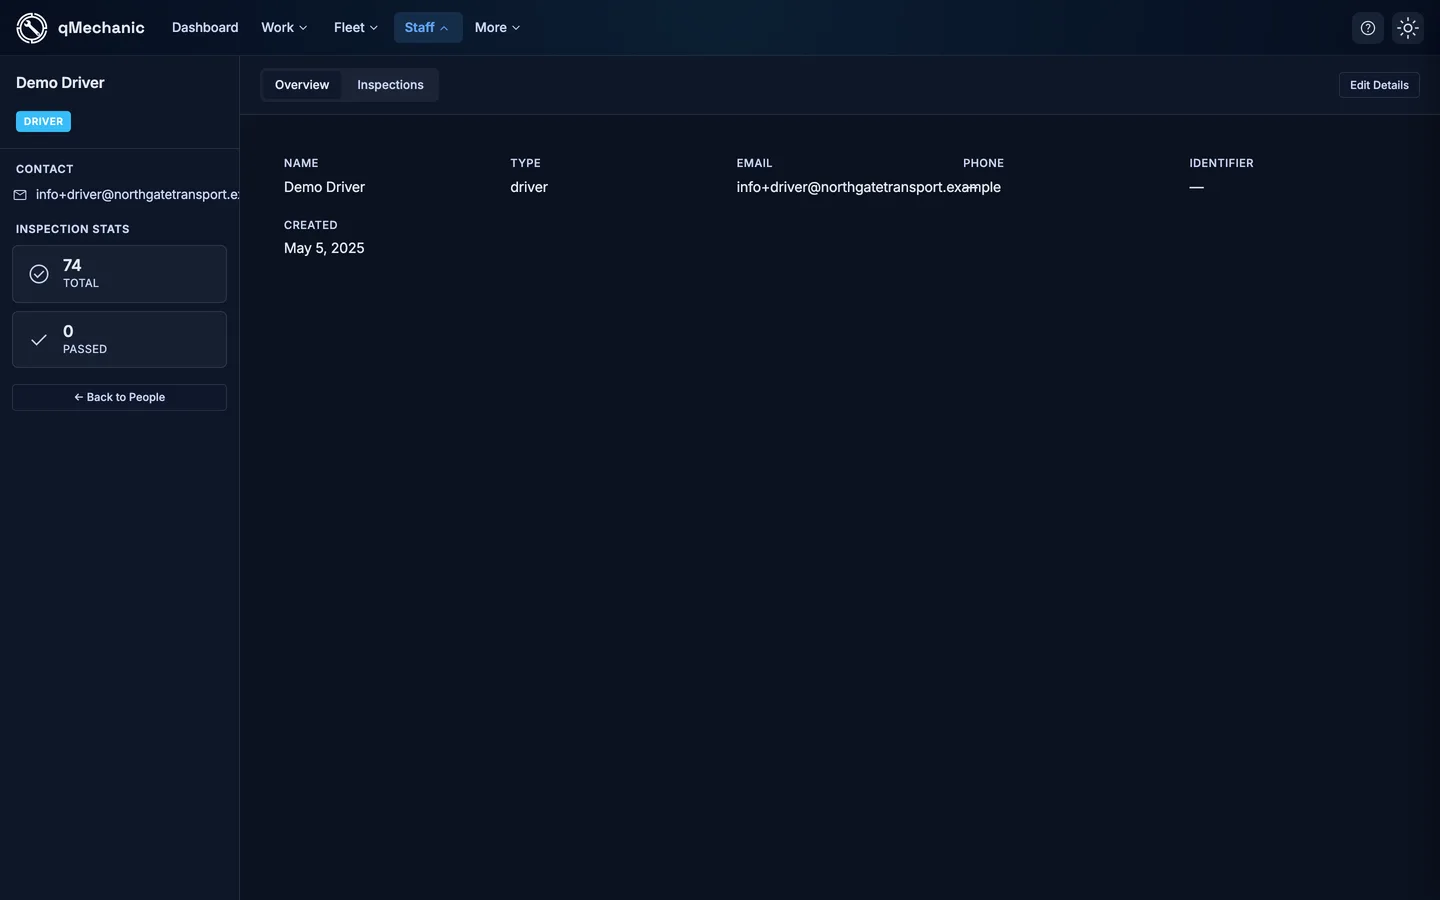
- Go to Staff → Users → add a person.
- Set their Type: driver for anyone doing walkarounds, technician for workshop staff, admin for office staff.
- Give them an email address and password — this is what they sign in to the mobile app with.
- For drivers, fill in the licence category, number and expiry so the system can warn you before it lapses.
TipDrivers and technicians sign in to the mobile app. Admins sign in here, to the console. The same login works for whichever they are entitled to.
Step 4 — Build your first template
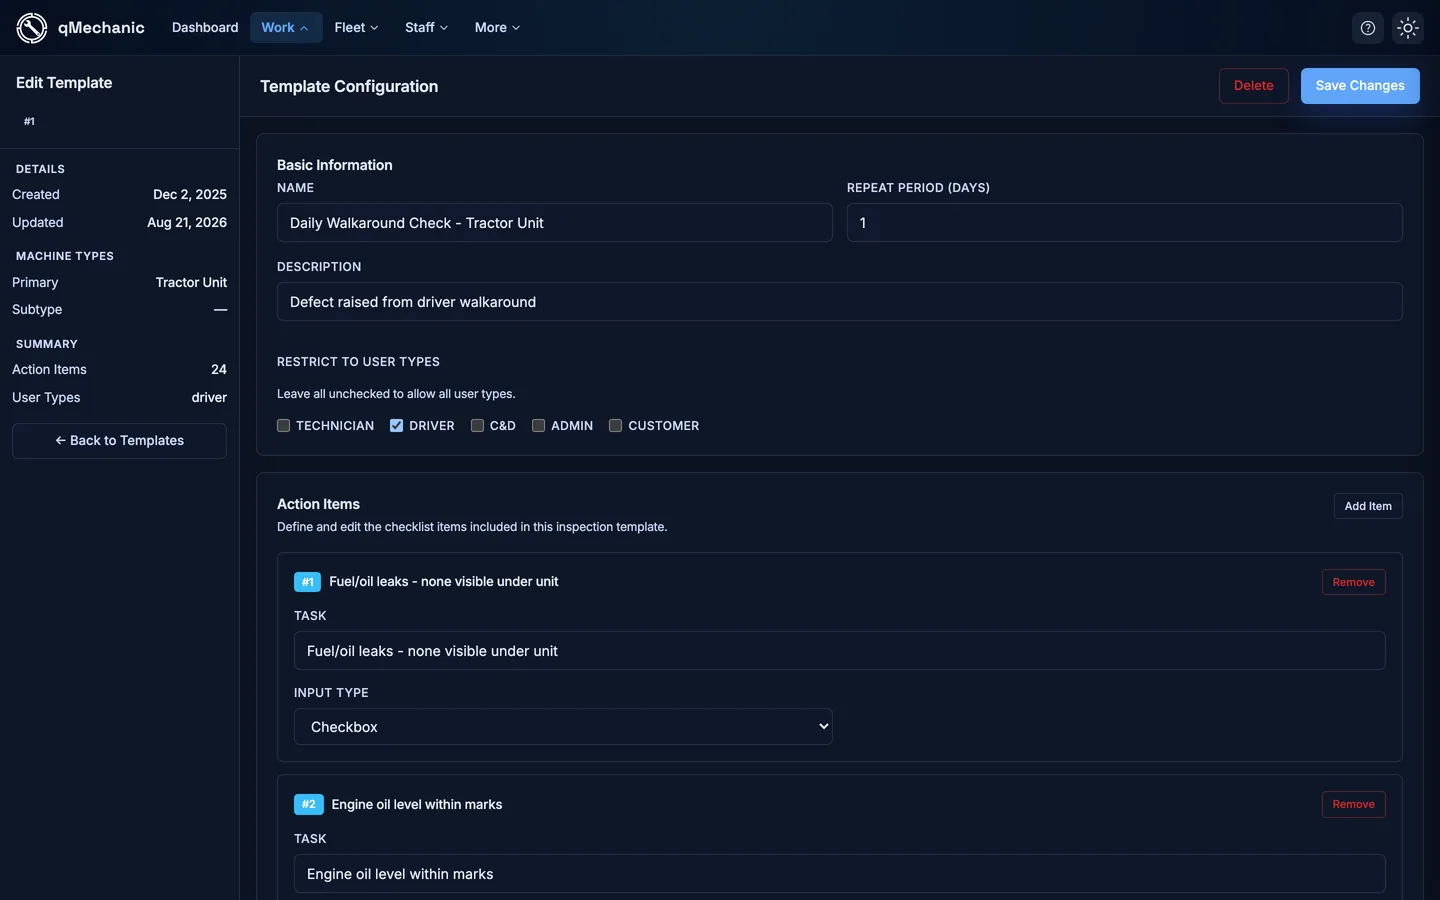
Start with the daily walkaround, because it is the one that runs every day and delivers value immediately. Go to Work → Inspections → Templates → “New template”.
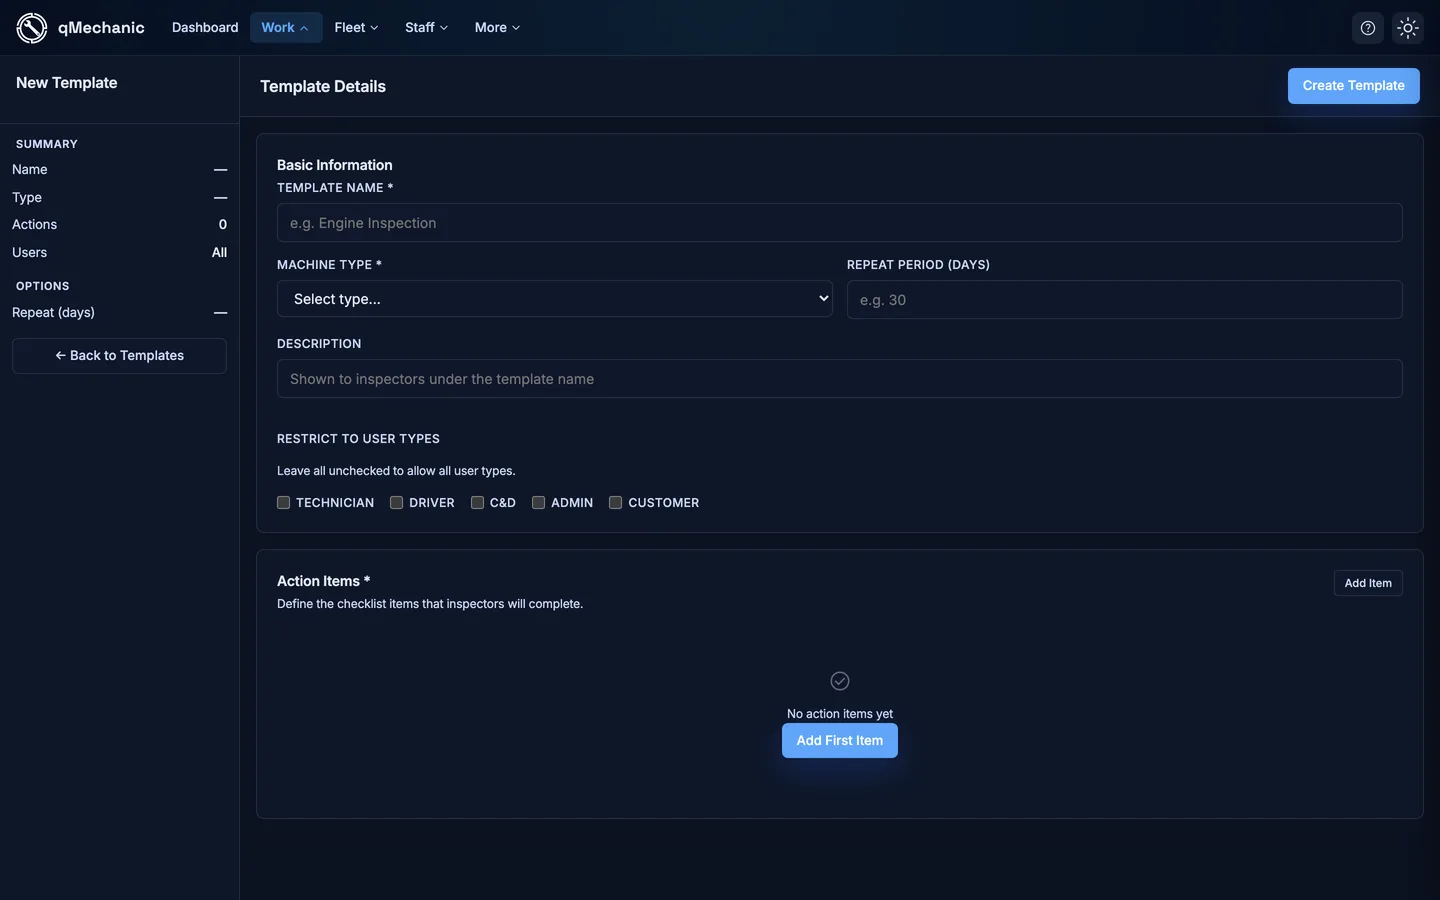
- Name it plainly — “Daily Walkaround Check - Tractor Unit” beats “Template 1”.
- Set Repeat period (days) to 1 for a daily check, 42 for a six-weekly inspection.
- Add a Description if the name alone is not obvious — inspectors see it under the template name when they pick a check.
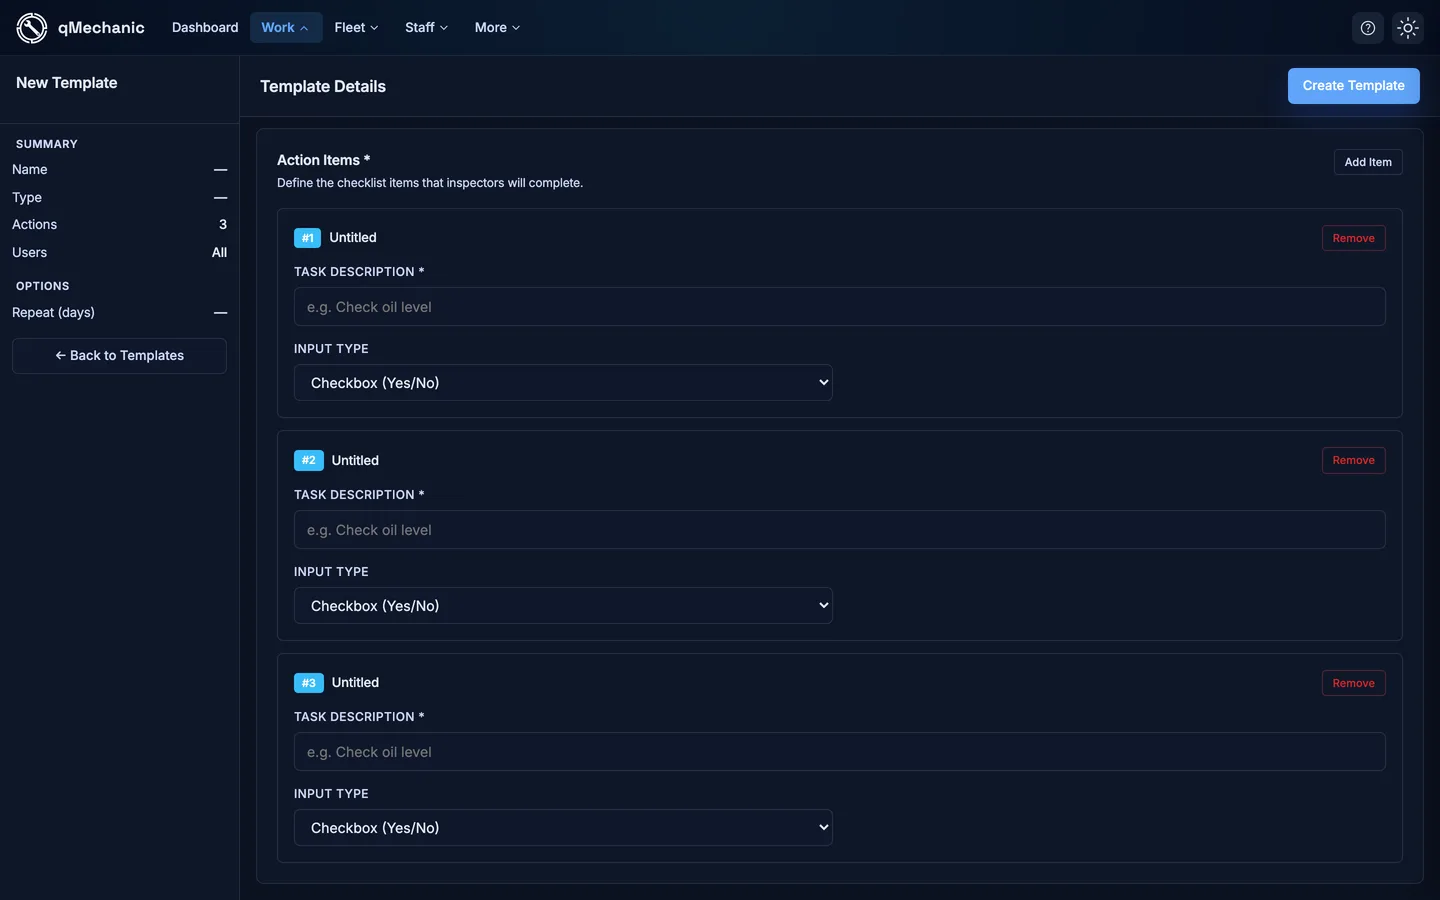
- Under Action Items, select “Add Item” and write one line per physical check.
- Choose the Input Type for each item (see the note below), then Save.
TipThere are four input types. Checkbox is a pass/fail. Number captures a reading such as tread depth or brake efficiency. Text takes a free-form comment. Photo asks for a picture. Use Number wherever you would otherwise argue about what “worn” meant.
TipWrite items as a question with an obvious right answer — “Oil level within marks” rather than “Oil”. The inspector is holding a phone in the rain; make it unambiguous.
Step 5 — Decide who gets it, and how often
Two fields do the routing. Restricted user types controls who is offered the checklist, and Repeat period controls how often it is due.
- Open the template from Work → Inspections → Templates.
- Set Restricted user types to the user type that should do this check — for example driver. Leave it blank and everybody sees it.
- Confirm the Machine type matches the vehicles it should apply to.
- Set Repeat period (days) so the schedule knows when it is next due.
- Select “Save Changes”.
TipRestricted user types takes a comma-separated list, so driver,c&d is valid if two groups share a check.
Step 6 — Check it actually reached the app
Do not assume. Verify from the driver’s side before you tell anyone it is live.
- Ask a driver to sign out and back in on the mobile app, or sign in yourself with a driver account.
- Start a new inspection and confirm your template appears in the list.
- Confirm the vehicle you expect is selectable.
- Complete it once yourself, end to end, so you have seen what your drivers will see.
TipIf the template does not appear, the usual cause is one of two things: Restricted user types does not include that person’s type, or the vehicle is attached to a different Machine type than the template.
Step 7 — Set up reminders and tell people
The system can chase people for you, and you can put a message on every driver’s home screen.
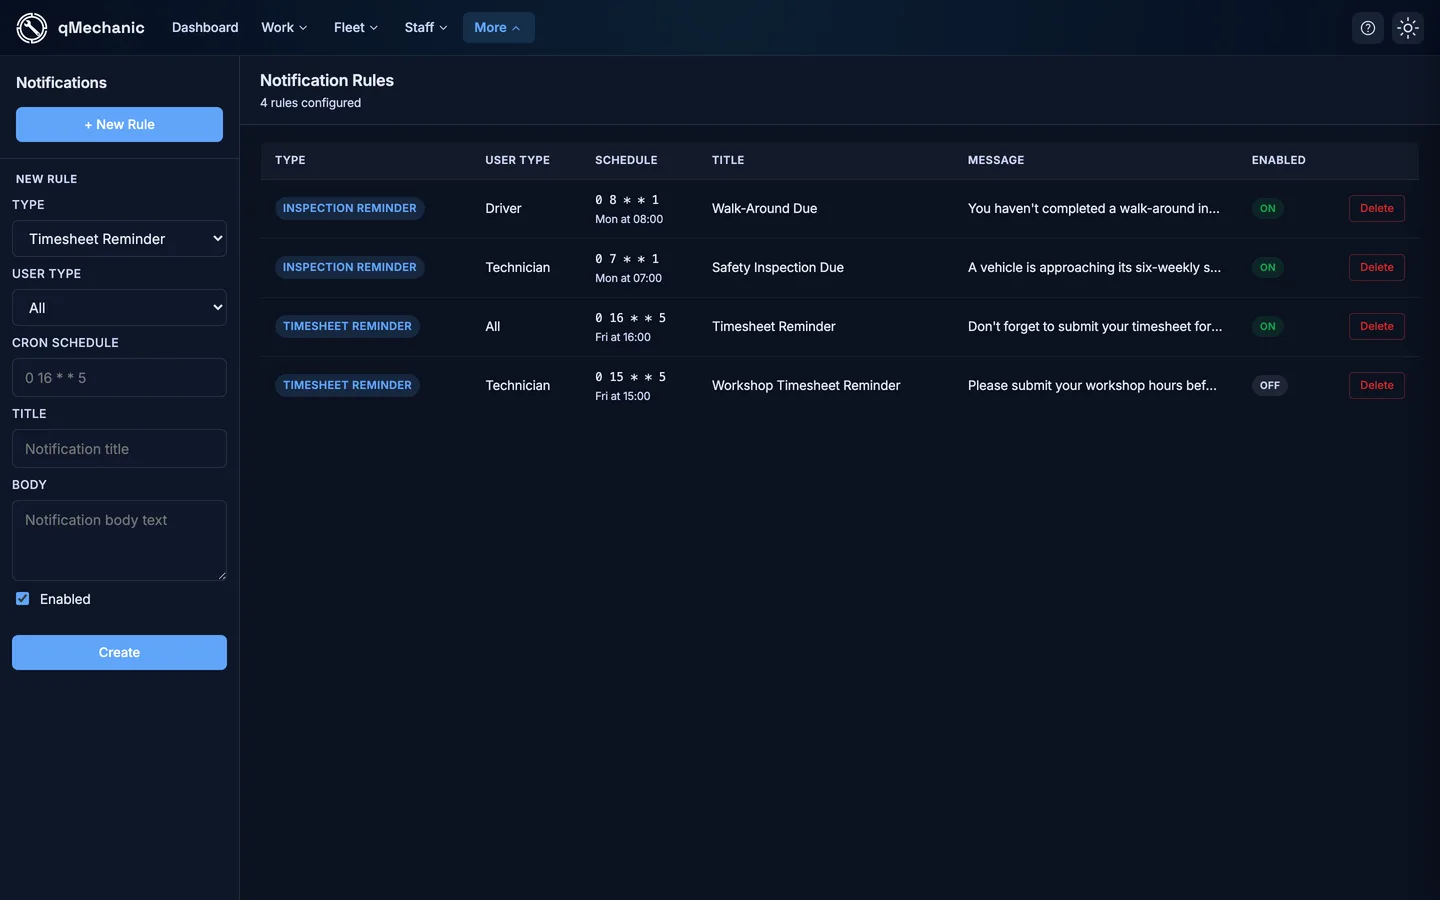
- Go to More → Notifications to review the inspection reminder, its schedule and how many days it allows before nudging.
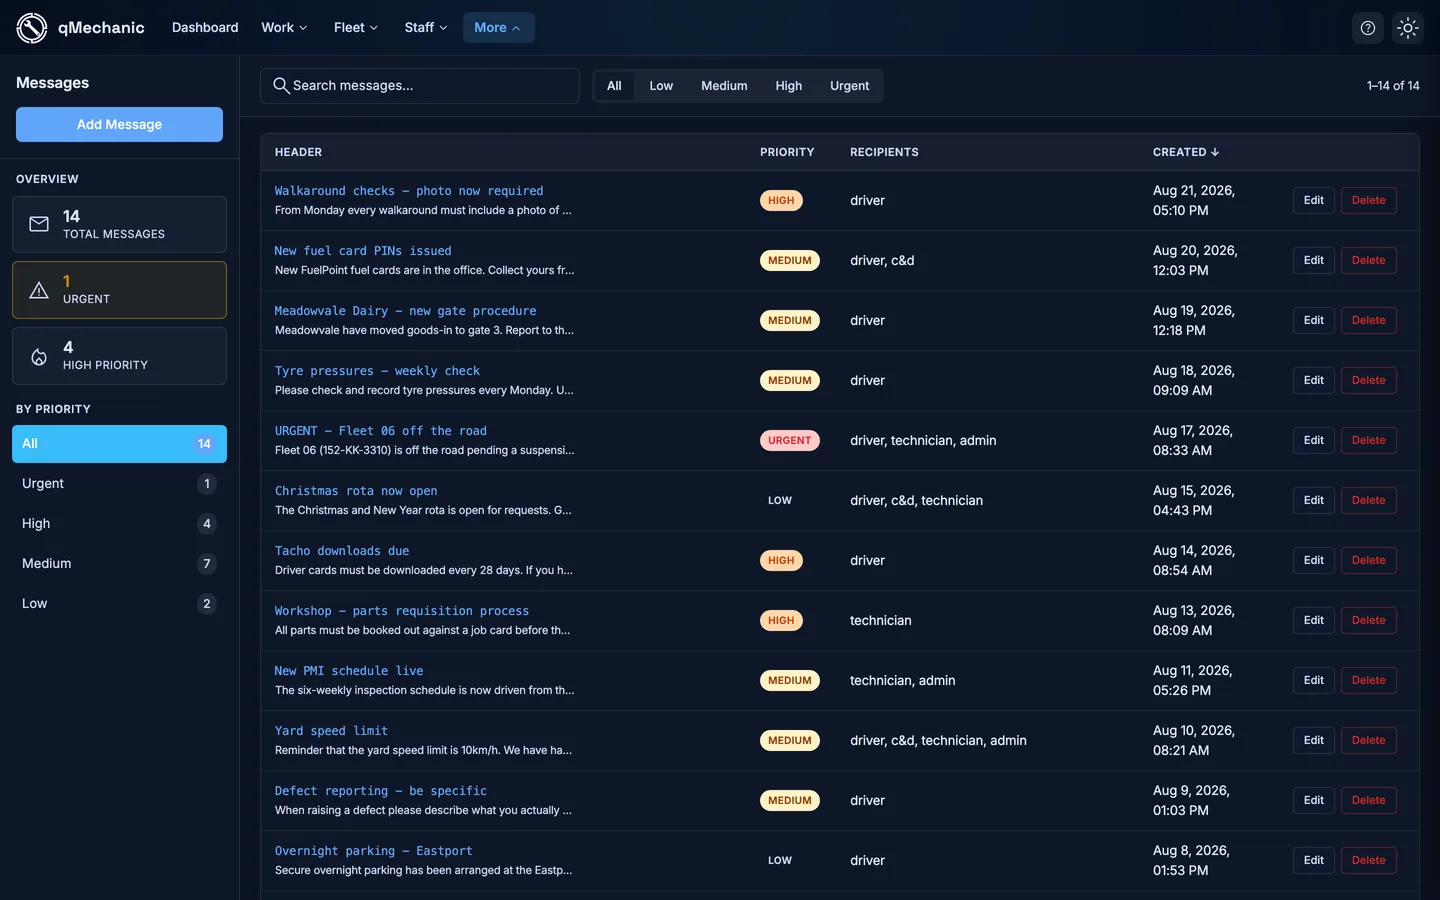
- Go to Staff → Messages → add a message announcing the new check, and target the driver user type.
- Set the importance so it stands out — urgent messages are hard to miss on the home screen.
TipDrivers and technicians only see messages from the last two weeks, and the newest ten. Post the important ones close to when you need them read.